YOLOX
YOLOX
This tutorial demonstrates how to deploy the YOLOX object detection model on the LicheePi 4A and implement efficient inference using HHB-onnxruntime.
Before proceeding with this tutorial, please ensure you have completed the Environment Configuration section.
Obtaining Example Code
The example code accompanying this tutorial is available on GitHub. Clone it to your local machine using the git command.
$ git clone https://github.com/zhangwm-pt/lpi4a-example.git
The code relevant to this tutorial is located in the detection/yolox directory.
Model Acquisition
The model we use is from Megvii-BaseDetection/YOLOX. You can download the YOLOX model using the following commands:
$ git clone https://github.com/Megvii-BaseDetection/YOLOX.git
$ cd YOLOX/demo/ONNXRuntime
$ wget https://github.com/Megvii-BaseDetection/YOLOX/releases/download/0.1.1rc0/yolox_s.onnx
If you experience network issues when accessing GitHub from mainland China, consider using a network proxy tool to accelerate access.
Source Code Modification
Modify the beginning of the file demo/ONNXRuntime/onnx_inference.py by adding lines four and five as shown below:
#!/usr/bin/env python3
# Copyright (c) Megvii, Inc. and its affiliates.

+import sys
+sys.path.insert(0, "../../")

import argparse
import os
The code uses sys.path.insert to specify the search path, thereby eliminating the need to install the YOLOX package from source.
Environment Preparation
The YOLOX example in this tutorial depends on multiple Python packages. Download the pre-compiled Python packages:
$ git clone -b python3.11 https://github.com/zhangwm-pt/prebuilt_whl.git
$ cd prebuilt_whl
Alternatively, manually download and install the packages using:
$ pip3 install numpy-1.25.0-cp311-cp311-linux_riscv64.whl
$ pip3 install opencv_python-4.5.4+4cd224d-cp311-cp311-linux_riscv64.whl
$ pip3 install kiwisolver-1.4.4-cp311-cp311-linux_riscv64.whl
$ pip3 install Pillow-9.5.0-cp311-cp311-linux_riscv64.whl
$ pip3 install matplotlib-3.7.2.dev0+gb3bd929cf0.d20230630-cp311-cp311-linux_riscv64.whl
$ pip3 install pycocotools-2.0.6-cp311-cp311-linux_riscv64.whl
$ pip3 install loguru-0.7.0-py3-none-any.whl
$ pip3 install MarkupSafe-2.1.3-cp311-cp311-linux_riscv64.whl
$ pip3 install torch-2.0.0a0+gitc263bd4-cp311-cp311-linux_riscv64.whl
$ pip3 install torchvision-0.15.1a0-cp311-cp311-linux_riscv64.whl
$ pip3 install psutil-5.9.5-cp311-abi3-linux_riscv64.whl
$ pip3 install tqdm-4.65.0-py3-none-any.whl
$ pip3 install tabulate-0.9.0-py3-none-any.whl
During installation, pip automatically resolves any additional pure Python dependencies from the official source.
Inference Execution
Within the example directory, run the onnx_inference.py sample:
$ python3 onnx_inference.py -m yolox_s.onnx -i ../../assets/dog.jpg -o outdir -s 0.7 --input_shape 640,640
-m: Specifies the model file-i: Specifies the input image path-o: Specifies the output directory-s: Sets the detection threshold--input_shape: Specifies the input image dimensions
Reference Results
In this tutorial, the input is as shown in the following figure. Under a threshold of 0.7, the expected detection results of YOLOX are as follows.

After normal execution of the example, a result image dog.jpg will be generated in the outdir directory. The image will show detected objects with bounding boxes and probability annotations, as shown in the image below:
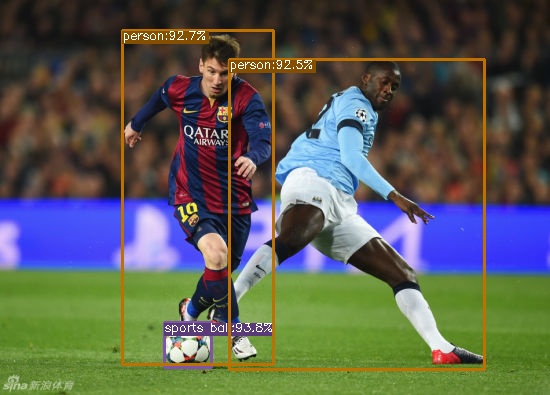
The detection identifies two people and one soccer ball.