Milk-V Meles Image Flashing Guide
This page describes the Linux workflow for flashing images to Milk-V Meles. Use the links below for other devices or operating systems.
| Other Flashing Tutorials | Link |
|---|---|
| Lichee Pi 4A (Linux) | Linux flashing guide |
| Lichee Pi 4A (Windows) | Windows flashing guide |
| Milk-V Pioneer | Flashing guide |
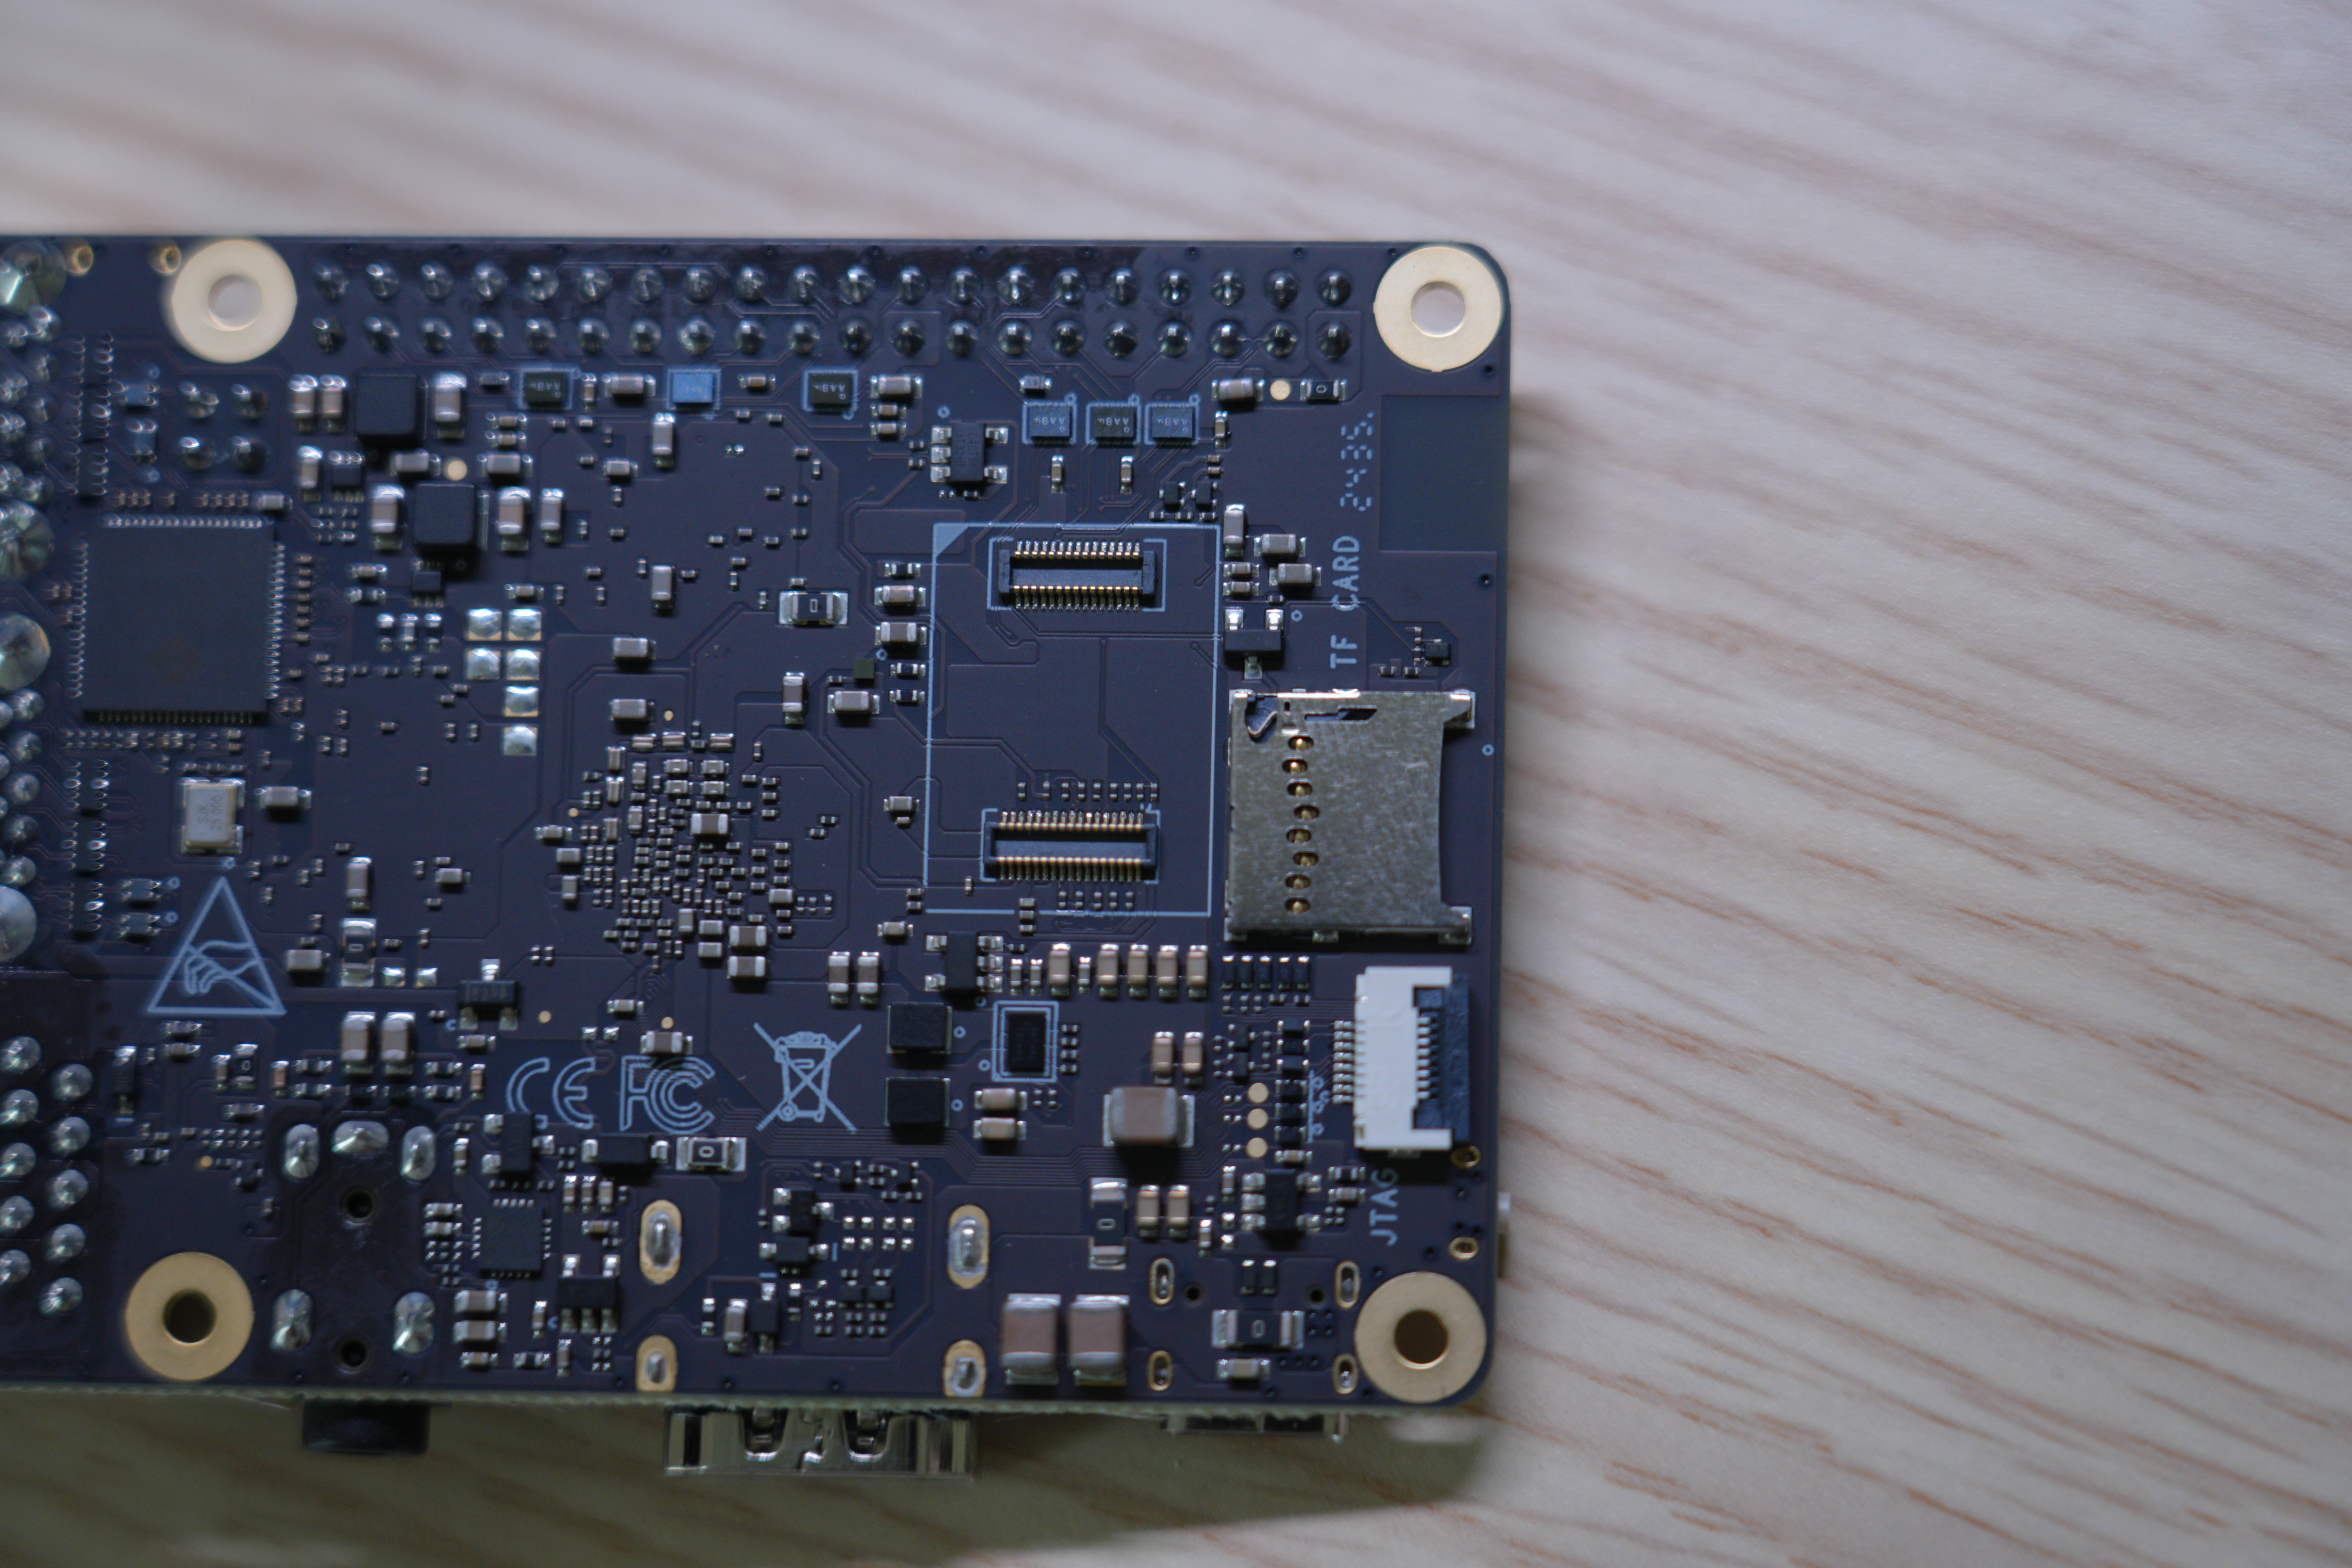
Before you proceed, compare your board against the reference image and make sure the hardware matches.
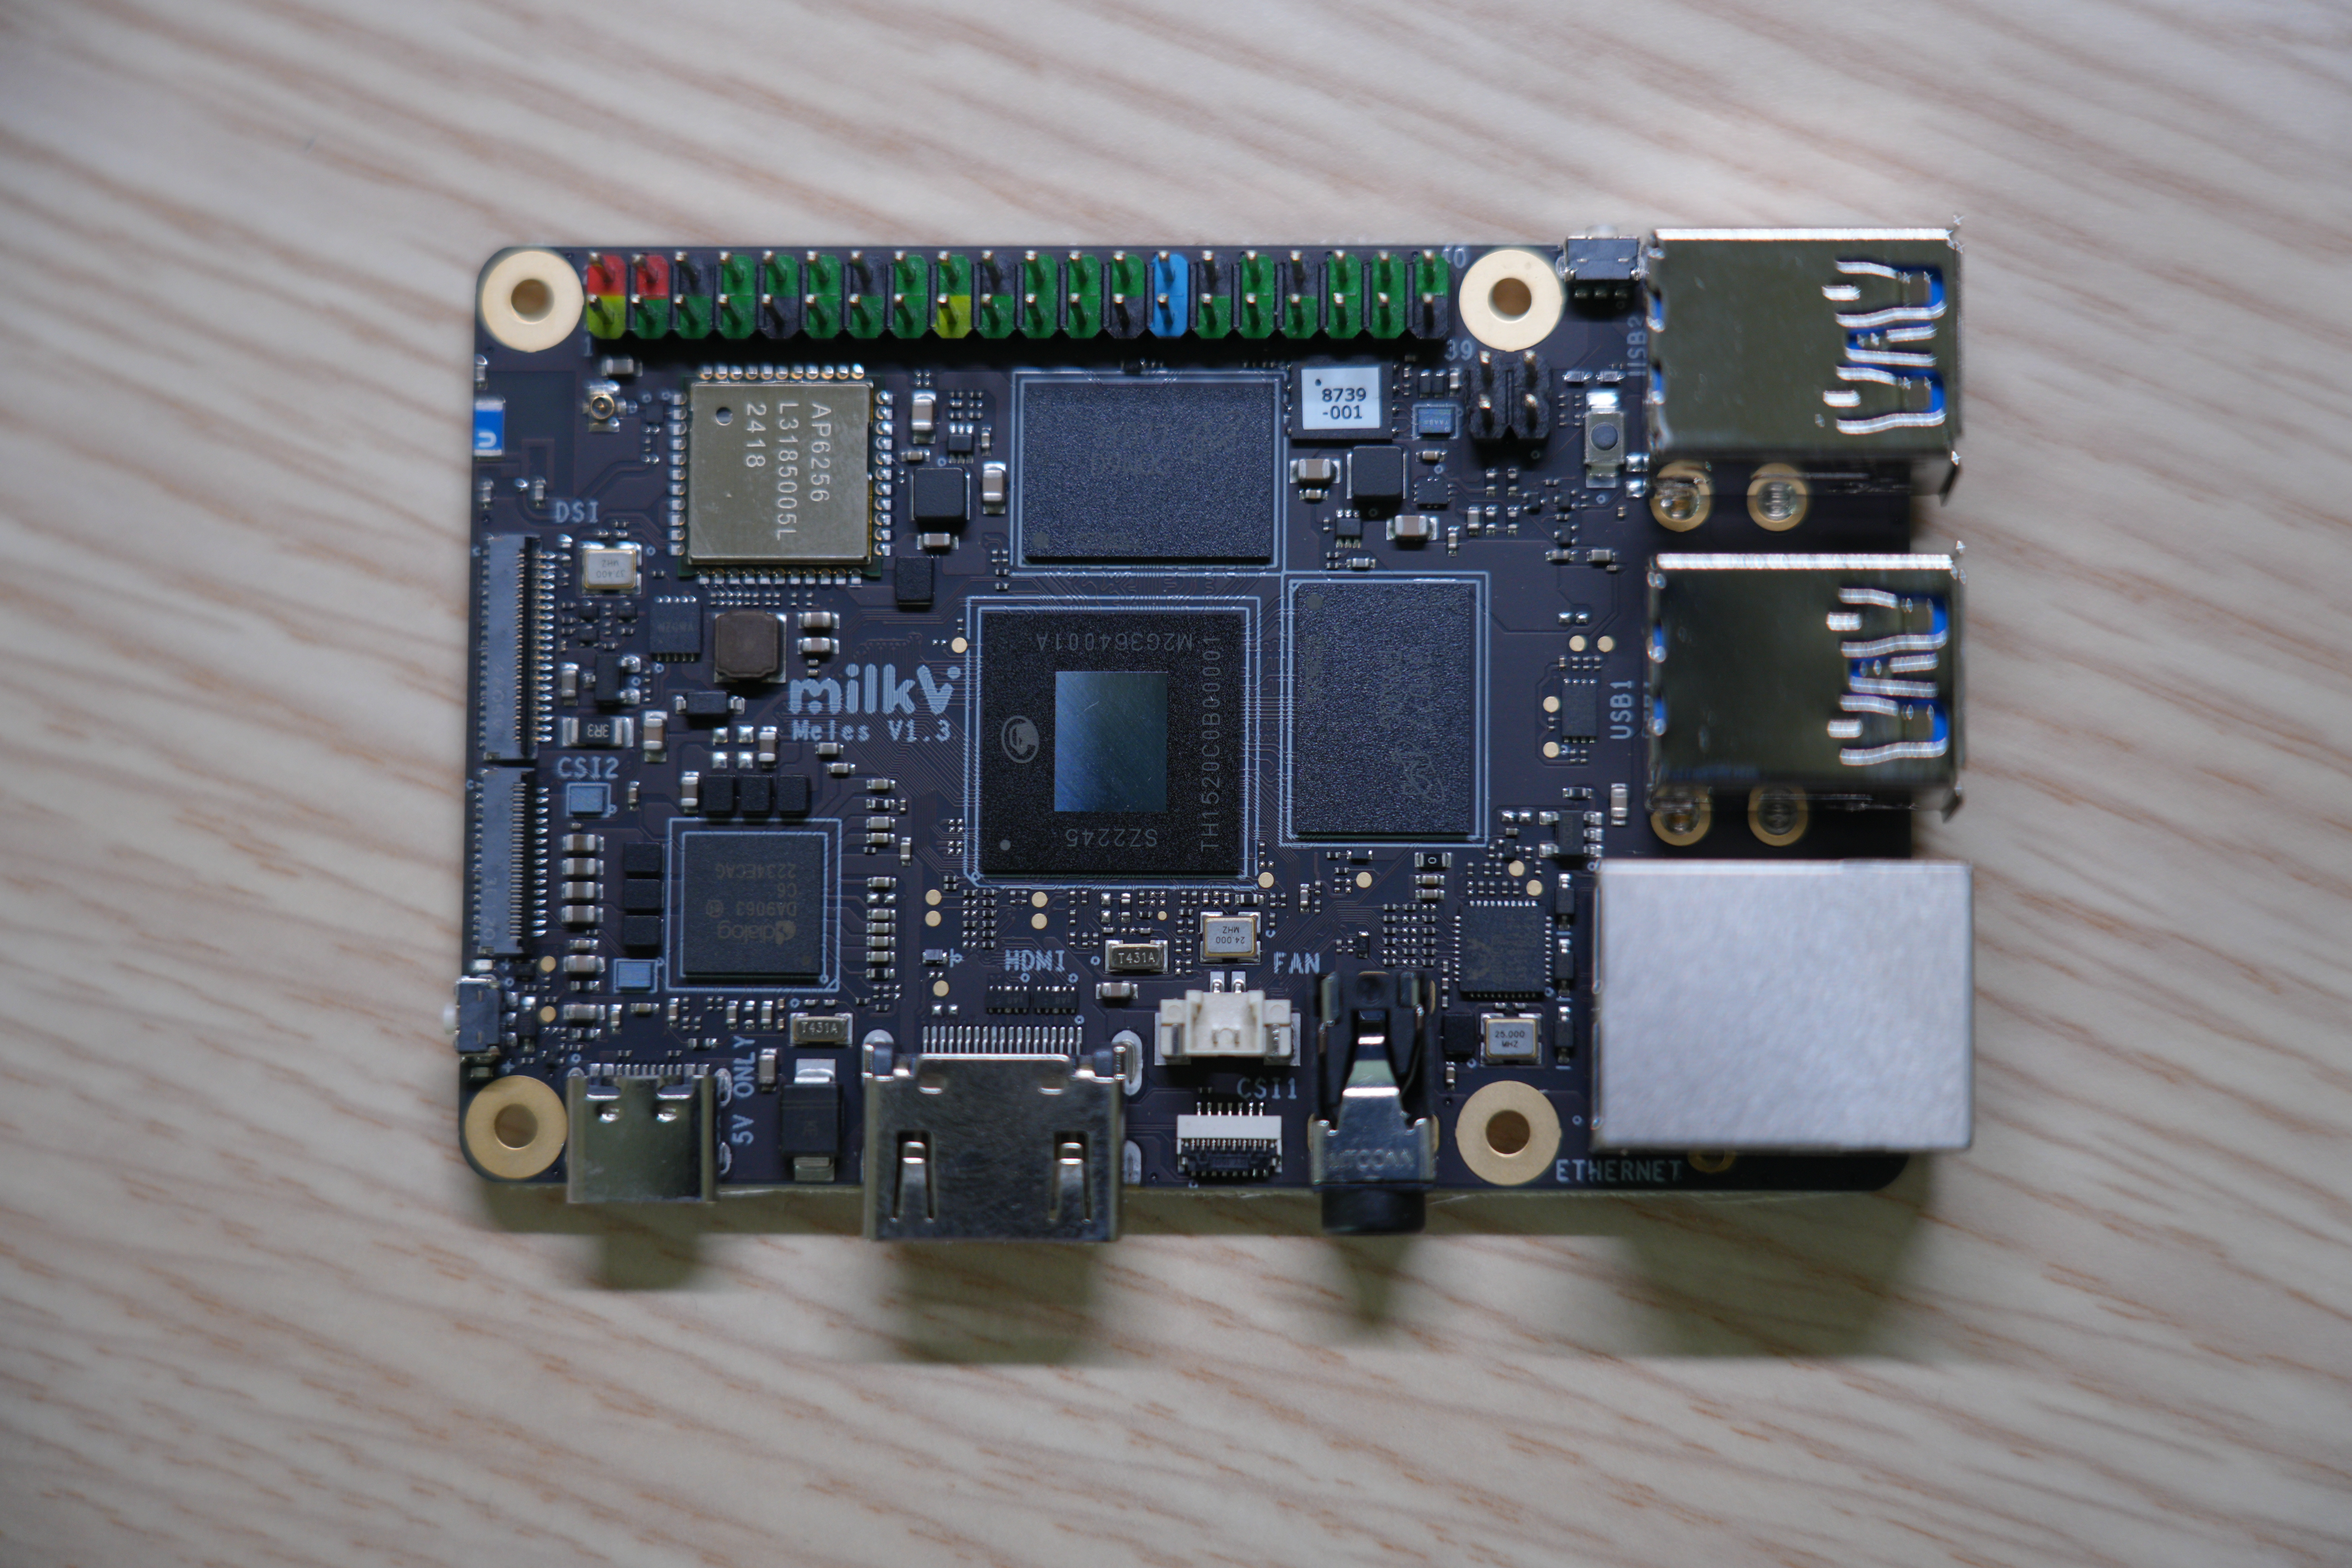
Demonstration Environment
All steps were validated under the following environment:
- Operating system: Ubuntu 22.04.5 LTS
- Architecture: x86_64
- Milk-V Meles configuration: 8 GB RAM
- Python version: 3.10.12
If you follow this procedure in the same environment and encounter issues, submit an issue via the support page.
Python versions newer than 3.12 may fail when writing the bootloader to SPI NOR flash. Use Python 3.11 or earlier.
Tool Installation
The following packages are required for downloading and flashing images. Install them before continuing.
Download Utility
In a desktop environment you can download images from the mirror via a browser. For command-line downloads we use wget.
wget --version
If wget is missing, install it:
sudo apt install wget

sudoprompts for your password. Ensure you know it; this reminder will not be repeated later.
Archive Utility
.zst archives can be unpacked with zstd, tar, or 7z. This tutorial demonstrates the zstd command-line tool. Confirm whether it is installed:
zstd --version

If no version is shown, install zstd:
sudo apt update
sudo apt install zstd
Boot Options
Milk-V Meles supports two boot paths: booting from an SD card and booting from eMMC. Choose the method that fits your scenario.
Flashing erases existing data. Back up important files before you begin.
Before tackling either boot mode, ensure that the SPI NOR flash holds the correct firmware. The next section explains how to program it.
Flash the SPI NOR Firmware
Milk-V Meles relies on its SPI NOR flash to store the bootloader that brings up the system and exposes the SoC download mode. The SoC cannot boot directly from MicroSD or USB.
If you replace the SPI NOR device or the firmware becomes corrupted, reflash the bootloader via a serial connection. Wiring instructions are available in the official hardware documentation; connect TX ↔ RX and GND ↔ GND between the board and host.
Preparation
Install Yoctools:
sudo pip install yoctools -U
If pip is unavailable, install it first:
sudo apt install python3-pip

Verify the installation:
yoc --version

Download the image writer utility:
wget https://github.com/milkv-meles/thead-bin/raw/main/image-writer/iw-single-line.bin
Download the U-Boot binary that matches your board:
- 8 GB model:
u-boot-with-spl-meles.bin - 16 GB model:
u-boot-with-spl-meles-16g.bin
Example (8 GB board):
wget https://fast-mirror.isrc.ac.cn/revyos/extra/images/meles/20250323/u-boot-with-spl-meles.bin
Write the Bootloader to SPI NOR Flash
- Determine the serial port device (commonly
/dev/ttyUSB0). - List available devices with
cct:
sudo cct list -u /dev/ttyUSB0
The program waits for the board to respond. Connect the USB-to-TTL adapter, wire TX ↔ RX and GND ↔ GND, press and hold the download button, power the board via USB Type-C, then release the button. The storage list should appear:
Memory device list:
  dev = ram0   , size =    1.1MB
  dev = qspi0  , size =   16.0MB
- Load the image writer into SRAM:
sudo cct download -u /dev/ttyUSB0 -d ram0 -f iw-single-line.bin -v checksum -r
Wait for the transfer and checksum to complete.
- Flash the U-Boot binary to SPI NOR (adjust the file name if you use the 16 GB image):
sudo cct download -u /dev/ttyUSB0 -d qspi0 -f u-boot-with-spl-meles.bin -v checksum -r -t 1200
A progress indicator appears; the operation typically finishes within a minute. After the checksum passes, the SPI NOR flash is updated.
You can now proceed with either boot method.
Boot from SD Card
Hardware Preparation
Prepare a MicroSD card reader and a MicroSD card. Because compatibility varies, refer to the tested card list.
If flashing or booting fails with an unlisted card, submit an issue and consider using the eMMC method instead.
Obtain the SD Card Image
Download the SD card image (prefixed with sdcard-meles-) from:
- RevyOS 20240720 (Kernel 5.10)
- Latest release (Kernel 6.6): 20251226
Example for RevyOS 20250323:
wget https://fast-mirror.isrc.ac.cn/revyos/extra/images/meles/20250323/sdcard-meles-20250323_154525.img.zst
unzstd sdcard-meles-20250323_154525.img.zst
The extraction generates sdcard-meles-20250323_154525.img.
Writing Options
Choose one of the following methods to write the image to the SD card:
BalenaEtcher
Download BalenaEtcher from https://etcher.balena.io/ and install the Linux x64 build.

- Insert the SD card.
- Launch BalenaEtcher.
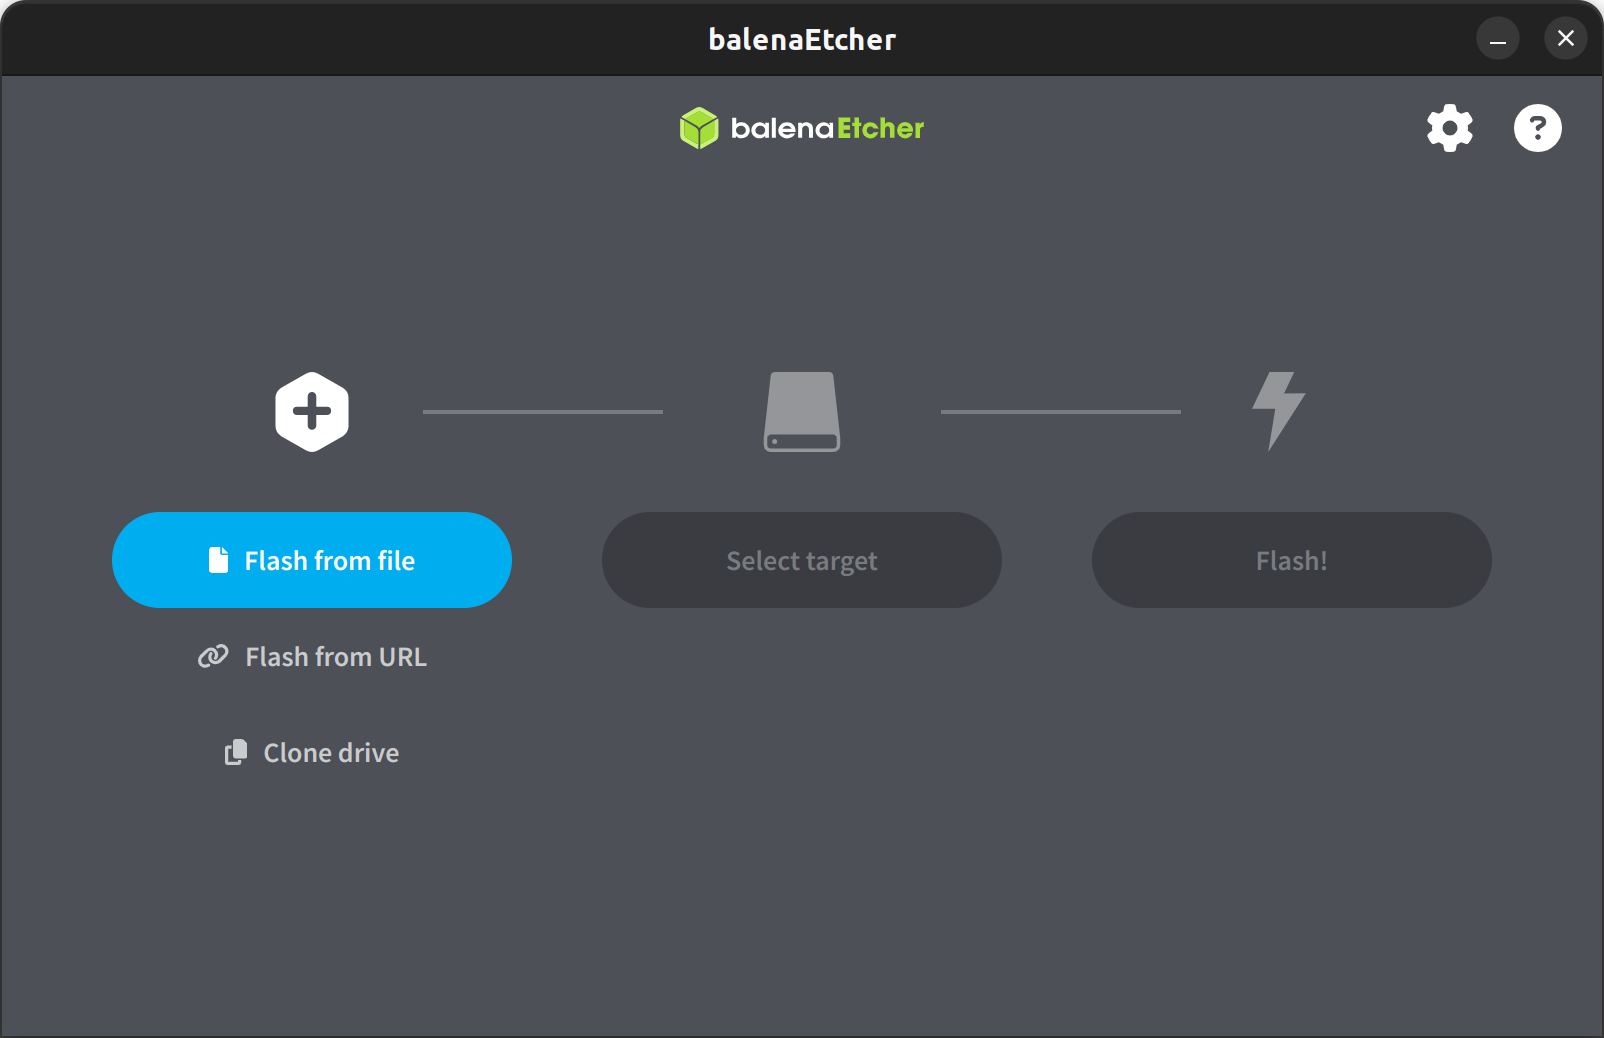
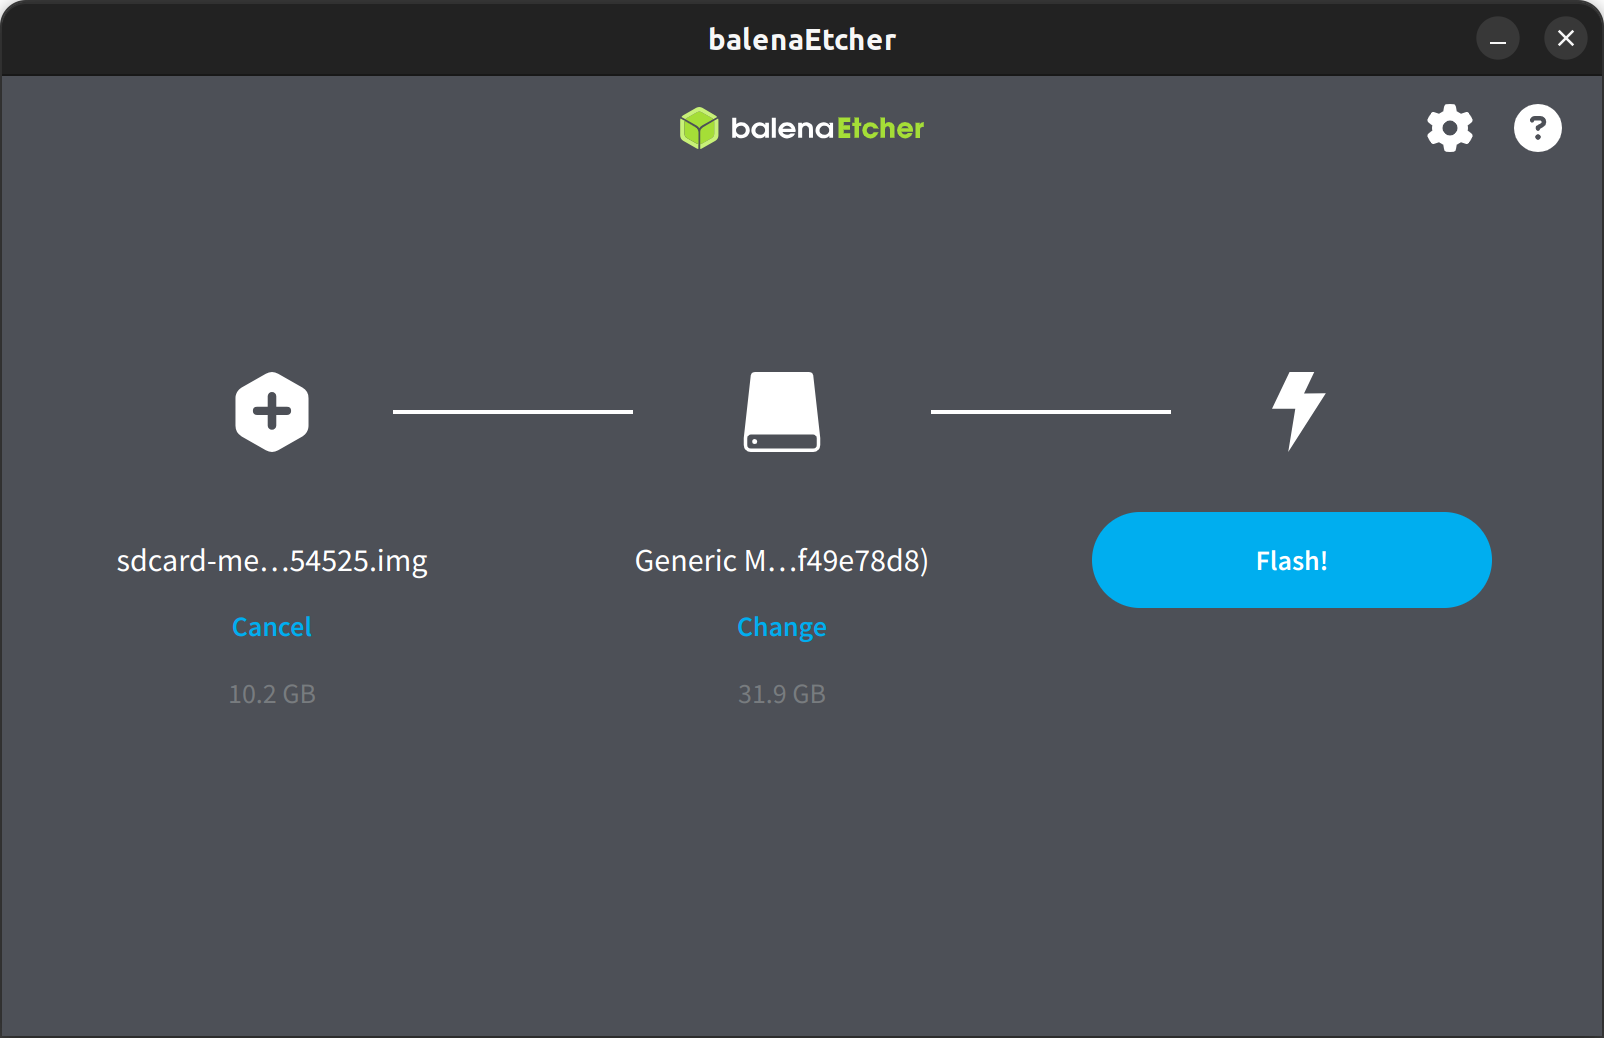
- Click Flash from file and select the image.
- Select the target device.
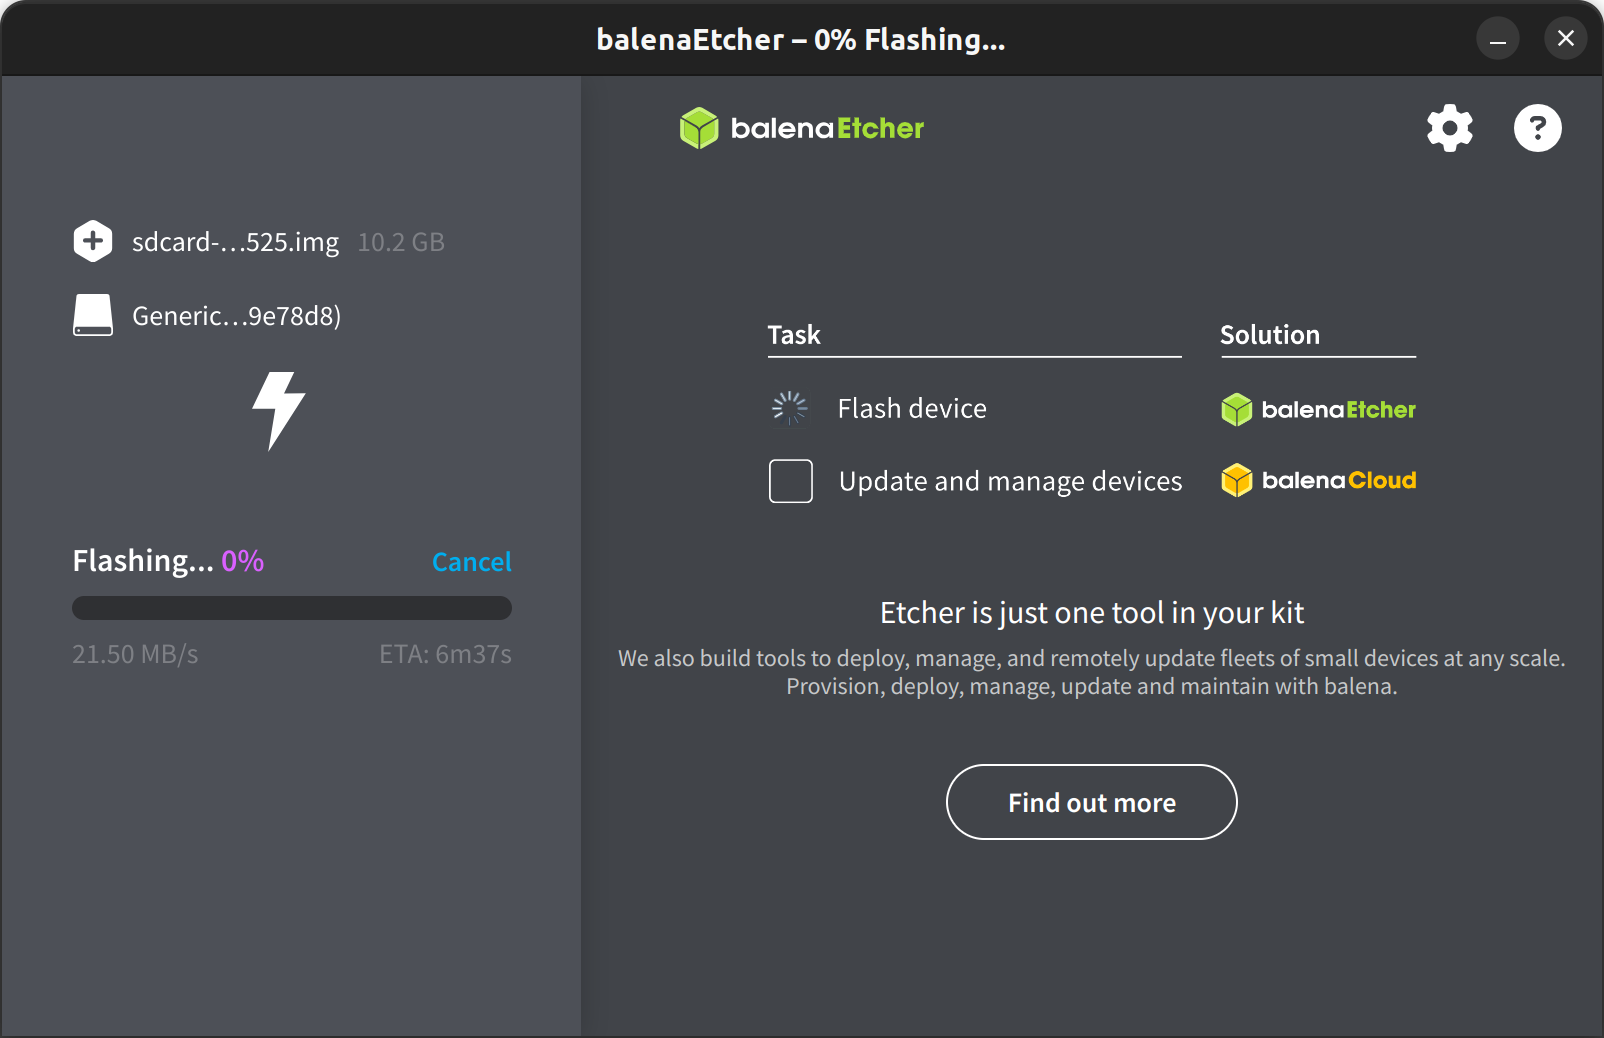
- Click Flash and wait for completion.
dd
- Identify the device node (
/dev/sdXor/dev/mmcblk0) usinglsblk. - Unmount any mounted partitions:
sudo umount /dev/sdX1
- Flush pending writes:
sudo sync
- Write the image (replace
sdXwith the correct device):
sudo dd if=sdcard-meles-20250323_154525.img of=/dev/sdX bs=4M status=progress
sudo sync

Ensure the card is unmounted before removing it.
Boot from SD Card
Insert the SD card into the slot shown below and power on the board.
Boot from eMMC
Ensure the eMMC module is installed on the back of the board before flashing.
Obtain the eMMC Images
Download the following files:
- RevyOS 20240720 (Kernel 5.10)
- Latest release (Kernel 6.6): 20251226
Required files:
u-boot-with-spl-meles*.bin— U-Boot binaryboot-meles-*.ext4.zst— boot partitionroot-meles-*.ext4.zst— root partition
Example (20250323):
wget https://fast-mirror.isrc.ac.cn/revyos/extra/images/meles/20250323/u-boot-with-spl-meles.bin
wget https://fast-mirror.isrc.ac.cn/revyos/extra/images/meles/20250323/boot-meles-20250323_154525.ext4.zst
wget https://fast-mirror.isrc.ac.cn/revyos/extra/images/meles/20250323/root-meles-20250323_154525.ext4.zst
unzstd boot-meles-20250323_154525.ext4.zst
unzstd root-meles-20250323_154525.ext4.zst
Install Fastboot
Check whether fastboot is available:
fastboot --version
If not, install it:
sudo apt install fastboot

Flash the eMMC
- Enter download mode:
- Hold the download button on the board.
- Connect a USB Type-C cable from the power port to the host.
- Release the button.
- Confirm that
lsusblistsID 2345:7654 T-HEAD USB download gadget. - Flash the images:
fastboot flash ram u-boot-with-spl-meles.bin
fastboot reboot
sleep 3
fastboot flash boot boot-meles-20250323_154525.ext4
fastboot flash root root-meles-20250323_154525.ext4
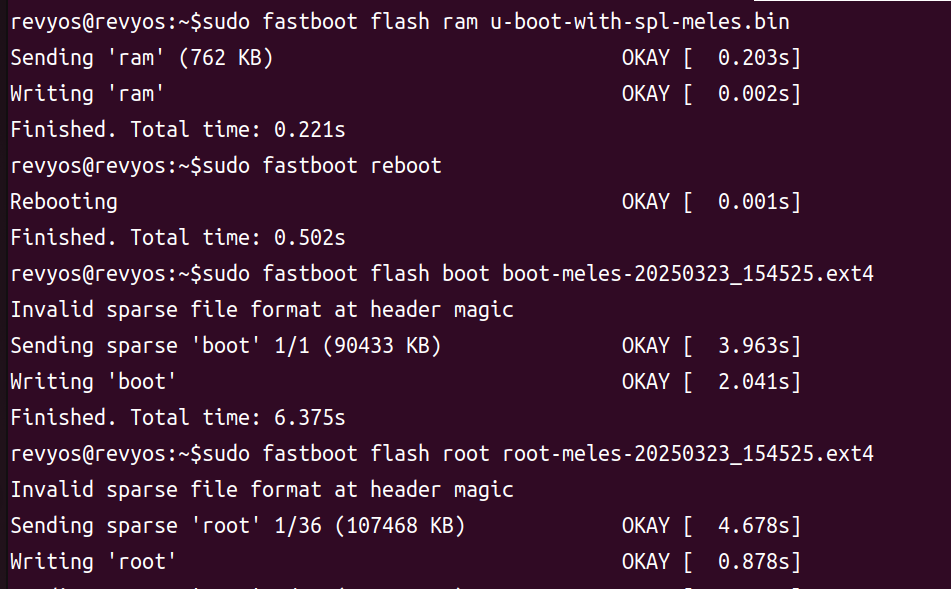
After flashing, reboot to start from eMMC.
Troubleshooting
Weak Wi-Fi Signal on the Latest Kernel
When using the latest RevyOS kernel (6.6.82 at the time of writing), the board defaults to an external antenna. Without an antenna connected to the IPEX connector, Wi-Fi performance degrades significantly.
Use gpiod to switch to the onboard antenna:
sudo apt update && sudo apt upgrade -y
sudo apt install -y gpiod
sudo gpioset 5 24=1
Reapply the GPIO setting after each reboot.
User Credentials
Default login credentials:
- Username:
debian - Password:
debian
Change the password immediately after the first login for security.