YOLOv5
YOLOv5
This tutorial explains how to run the YOLOv5 model on the RevyOS system using either the CPU or the NPU.
Before proceeding with this tutorial, please ensure you have completed the Environment Configuration section.
Obtaining Example Code
The example code accompanying this tutorial is available on GitHub. Clone it to your local machine using the git command.
$ git clone https://github.com/zhangwm-pt/lpi4a-example.git
The code relevant to this tutorial is located in the detection/yolov5 directory.
Model Acquisition
The model used in this tutorial originates from the YOLOv5 repository and can be exported via its export.py script.
$ git clone https://github.com/ultralytics/yolov5.git
$ cd yolov5
$ pip3 install ultralytics
$ python3 export.py --weights yolov5n.pt --include onnx --imgsz 384 640
If you experience network issues when accessing GitHub from mainland China, consider using a network proxy tool to accelerate access.
Model Conversion and Compilation
After completing the environment configuration, you can use HHB to compile the model into an executable program for the C920.
This tutorial uses the YOLOv5n detection model. For YOLOv5n, the HHB command truncates the graph at the final convolutional layer, and the subsequent post-processing is delegated to the provided yolov5n.c file.
Navigate to the detection/yolov5 directory and execute the following command:
- NPU
- CPU
$ hhb -D --model-file yolov5n.onnx --data-scale-div 255 \
    --board c920 --input-name "images" --output-name \
    "/model.24/m.0/Conv_output_0;/model.24/m.1/Conv_output_0;/model.24/m.2/Conv_output_0" \
    --input-shape "1 3 384 640" --quantization-scheme float16
$ hhb -D --model-file yolov5n.onnx --data-scale-div 255 \
    --board th1520 --input-name "images" --output-name \
    "/model.24/m.0/Conv_output_0;/model.24/m.1/Conv_output_0;/model.24/m.2/Conv_output_0" \
    --input-shape "1 3 384 640" --calibrate-dataset kite.jpg  \
    --quantization-scheme "int8_asym"
-D: Directs HHB to stop after generating the executable file--model-file: Specifies the input model file--data-mean: Specifies the mean value--data-scale: Specifies the scaling value--board: Specifies the target platform as C920 (CPU) or TH1520 (NPU)--input-name: Names the model input tensor--output-name: Names the model output tensor--input-shape: Specifies the model input tensor shape--postprocess: Configures the post-processing behavior for HHB-generated glue code;save_and_top5saves the outputs and prints the top-5 results--quantization-scheme: Specifies the quantization type
You can run hhb --help to view all available parameters and options.
After the command finishes, the current directory contains a newly created hhb_out subdirectory with files such as:
hhb.bm: HHB model file containing quantized weight datahhb_runtime: Executable file for the development board, compiled from the C sources in this directorymain.c: Reference entry point for the HHB-generated example programmodel.c: HHB model structure representation filemodel.params: Model weight fileio.c: HHB-generated example program providing file I/O helper functionsio.h: HHB-generated example program providing file I/O function declarationsprocess.c: HHB-generated example program providing image preprocessing functionsprocess.h: HHB-generated example program providing image preprocessing function declarations
GCC Post-processing Compilation
This tutorial implements the latter portion of the model and NMS in C so that post-processing yields detection results for the output image.
$ riscv64-unknown-linux-gnu-gcc yolov5n.c -o yolov5n_example hhb_out/io.c \
    hhb_out/model.c -Wl,--gc-sections -O2 -g -mabi=lp64d -I hhb_out/ -L \
    /usr/local/lib/python3.8/dist-packages/hhb/install_nn2/th1520/lib/ \
    -lshl -L /usr/local/lib/python3.8/dist-packages/hhb/prebuilt/decode/install/lib/rv \
    -L /usr/local/lib/python3.8/dist-packages/hhb/prebuilt/runtime/riscv_linux \
    -lprebuilt_runtime -ljpeg -lpng -lz -lstdc++ -lm -I \
    /usr/local/lib/python3.8/dist-packages/hhb/install_nn2/th1520/include/ -mabi=lp64d \
    -march=rv64gcv0p7_zfh_xtheadc -Wl,-unresolved-symbols=ignore-in-shared-libs -I \
    /usr/local/lib/python3.8/dist-packages/hhb/install_nn2/th1520/include/shl_public/ \
    -I /usr/local/lib/python3.8/dist-packages/hhb/install_nn2/th1520/include/csinn/
In the example code, the SHL library is linked; for example, its installation directory can be /usr/local/lib/python3.8/dist-packages/shl.
-Ihhb_out -I/usr/local/lib/python3.8/dist-packages/shl/install_nn2/c920/include/: Header search paths that include the SHL headers-L/usr/local/lib/python3.8/dist-packages/shl/install_nn2/c920/lib: Library search path that points to the precompiled SHL binaries-static: Enables static linking-o yolov5n_example: Specifies the name of the generated executable
After successful compilation, a yolov5n_example file will be generated in the example directory.
Execution
After cross-compilation, copy the required files to the development board directory.
For example, with board IP 10.63.x.x using /demo directory, copy the example program directory using scp:
scp -r yolov5n th1520@10.63.x.x:/demo/
When executing from the Linux command line on the board's terminal, the terminal output reports the following stages:
- Preprocessing: Scale and pad the original image to 384 × 640
- Model execution and post-processing: Perform model inference and apply NMS
- Bounding box drawing: Render the detection results on the 384 × 640 image
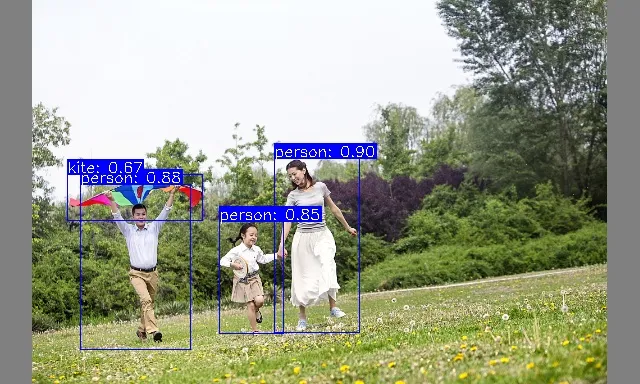
kite.jpg: Input imageimage_preprocessed.bin: Preprocessing intermediate resultyolov5n_example: Model execution file compiled on the x86 host with GCChhb_out/hhb.bm: Model execution file generated on the x86 host by HHBdetect.txt: Post-processing output file containing 4 detected objectskite_result.jpg: Output image with detection boxes added
Reference Results
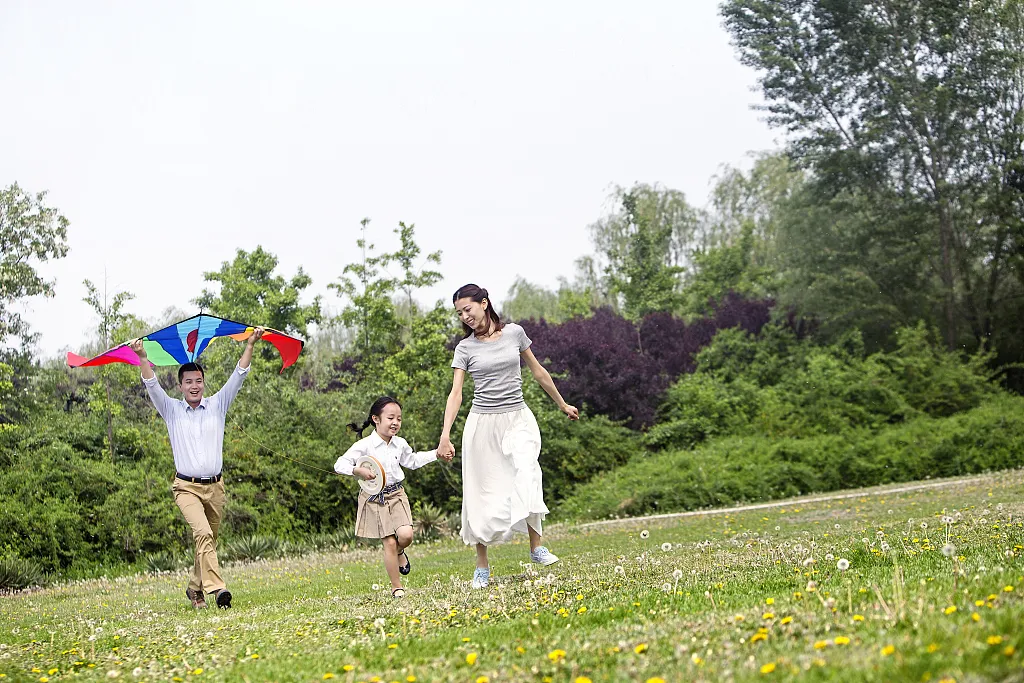
The input image shows a family of three flying a kite. YOLOv5 is expected to detect three people and one kite.
When the example runs successfully, the terminal prints output similar to the following:
- NPU
- CPU
$ .python3 inference.py
 ********** preprocess image **********
 ******* run yolov5 and postprocess *******
Run graph execution time: 401.13336ms, FPS=2.49
detect num: 4
id:     label   score           x1              y1              x2              y2
[0]:    0       0.899609        274.486389      158.510849      359.157715      332.118591
[1]:    0       0.880201        80.017410       184.470093      190.141861      349.840637
[2]:    0       0.844358        219.474869      221.711838      283.615723      333.643250
[3]:    33      0.667759        67.194008       174.118088      203.020660      220.667618
 ********** draw bbox **********
[274.486389, 158.510849, 359.157715, 332.118591, 0.899609, 0]
[80.01741, 184.470093, 190.141861, 349.840637, 0.880201, 0]
[219.474869, 221.711838, 283.615723, 333.64325, 0.844358, 0]
[67.194008, 174.118088, 203.02066, 220.667618, 0.667759, 33]
$ python3 inference.py
 ********** preprocess image **********
 ******* run yolov5 and postprocess *******
INFO: NNA clock:1001624 [kHz]
INFO: Heap :anonymous (0x2)
INFO: Heap :dmabuf (0x2)
INFO: Heap :unified (0x5)
WARNING: Mapping to the on chip ram failed (128 > 0), continuing...
FATAL: Importing 737280 bytes of CPU memory has failed (Invalid argument)
Run graph execution time: 11.96299ms, FPS=83.59
detect num: 4
id:     label   score           x1              y1              x2              y2
[0]:    0       0.895277        273.492188      161.245056      359.559814      330.644257
[1]:    0       0.887368        79.860062       179.181244      190.755692      354.304474
[2]:    0       0.815214        222.054565      224.477600      279.828979      333.717285
[3]:    33      0.563324        67.625580       173.948883      201.687988      219.065765
 ********** draw bbox **********
[273.492188, 161.245056, 359.559814, 330.644257, 0.895277, 0]
[79.860062, 179.181244, 190.755692, 354.304474, 0.887368, 0]
[222.054565, 224.4776, 279.828979, 333.717285, 0.815214, 0]
[67.62558, 173.948883, 201.687988, 219.065765, 0.563324, 33]