Lichee Pi 4A Image Flashing Guide (Windows)
This document describes how to flash Lichee Pi 4A images on Windows. For the Linux workflow or other device guides, use the links below.
| Other Flashing Tutorials | Link |
|---|---|
| Lichee Pi 4A (Linux) | Linux flashing guide |
| Milk-V Pioneer | Flashing guide |
| Milk-V Meles | Flashing guide |
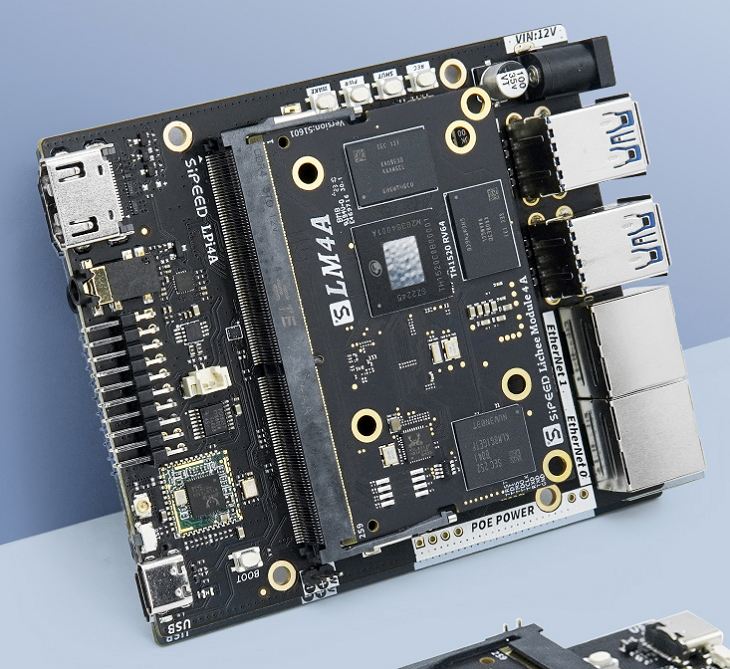
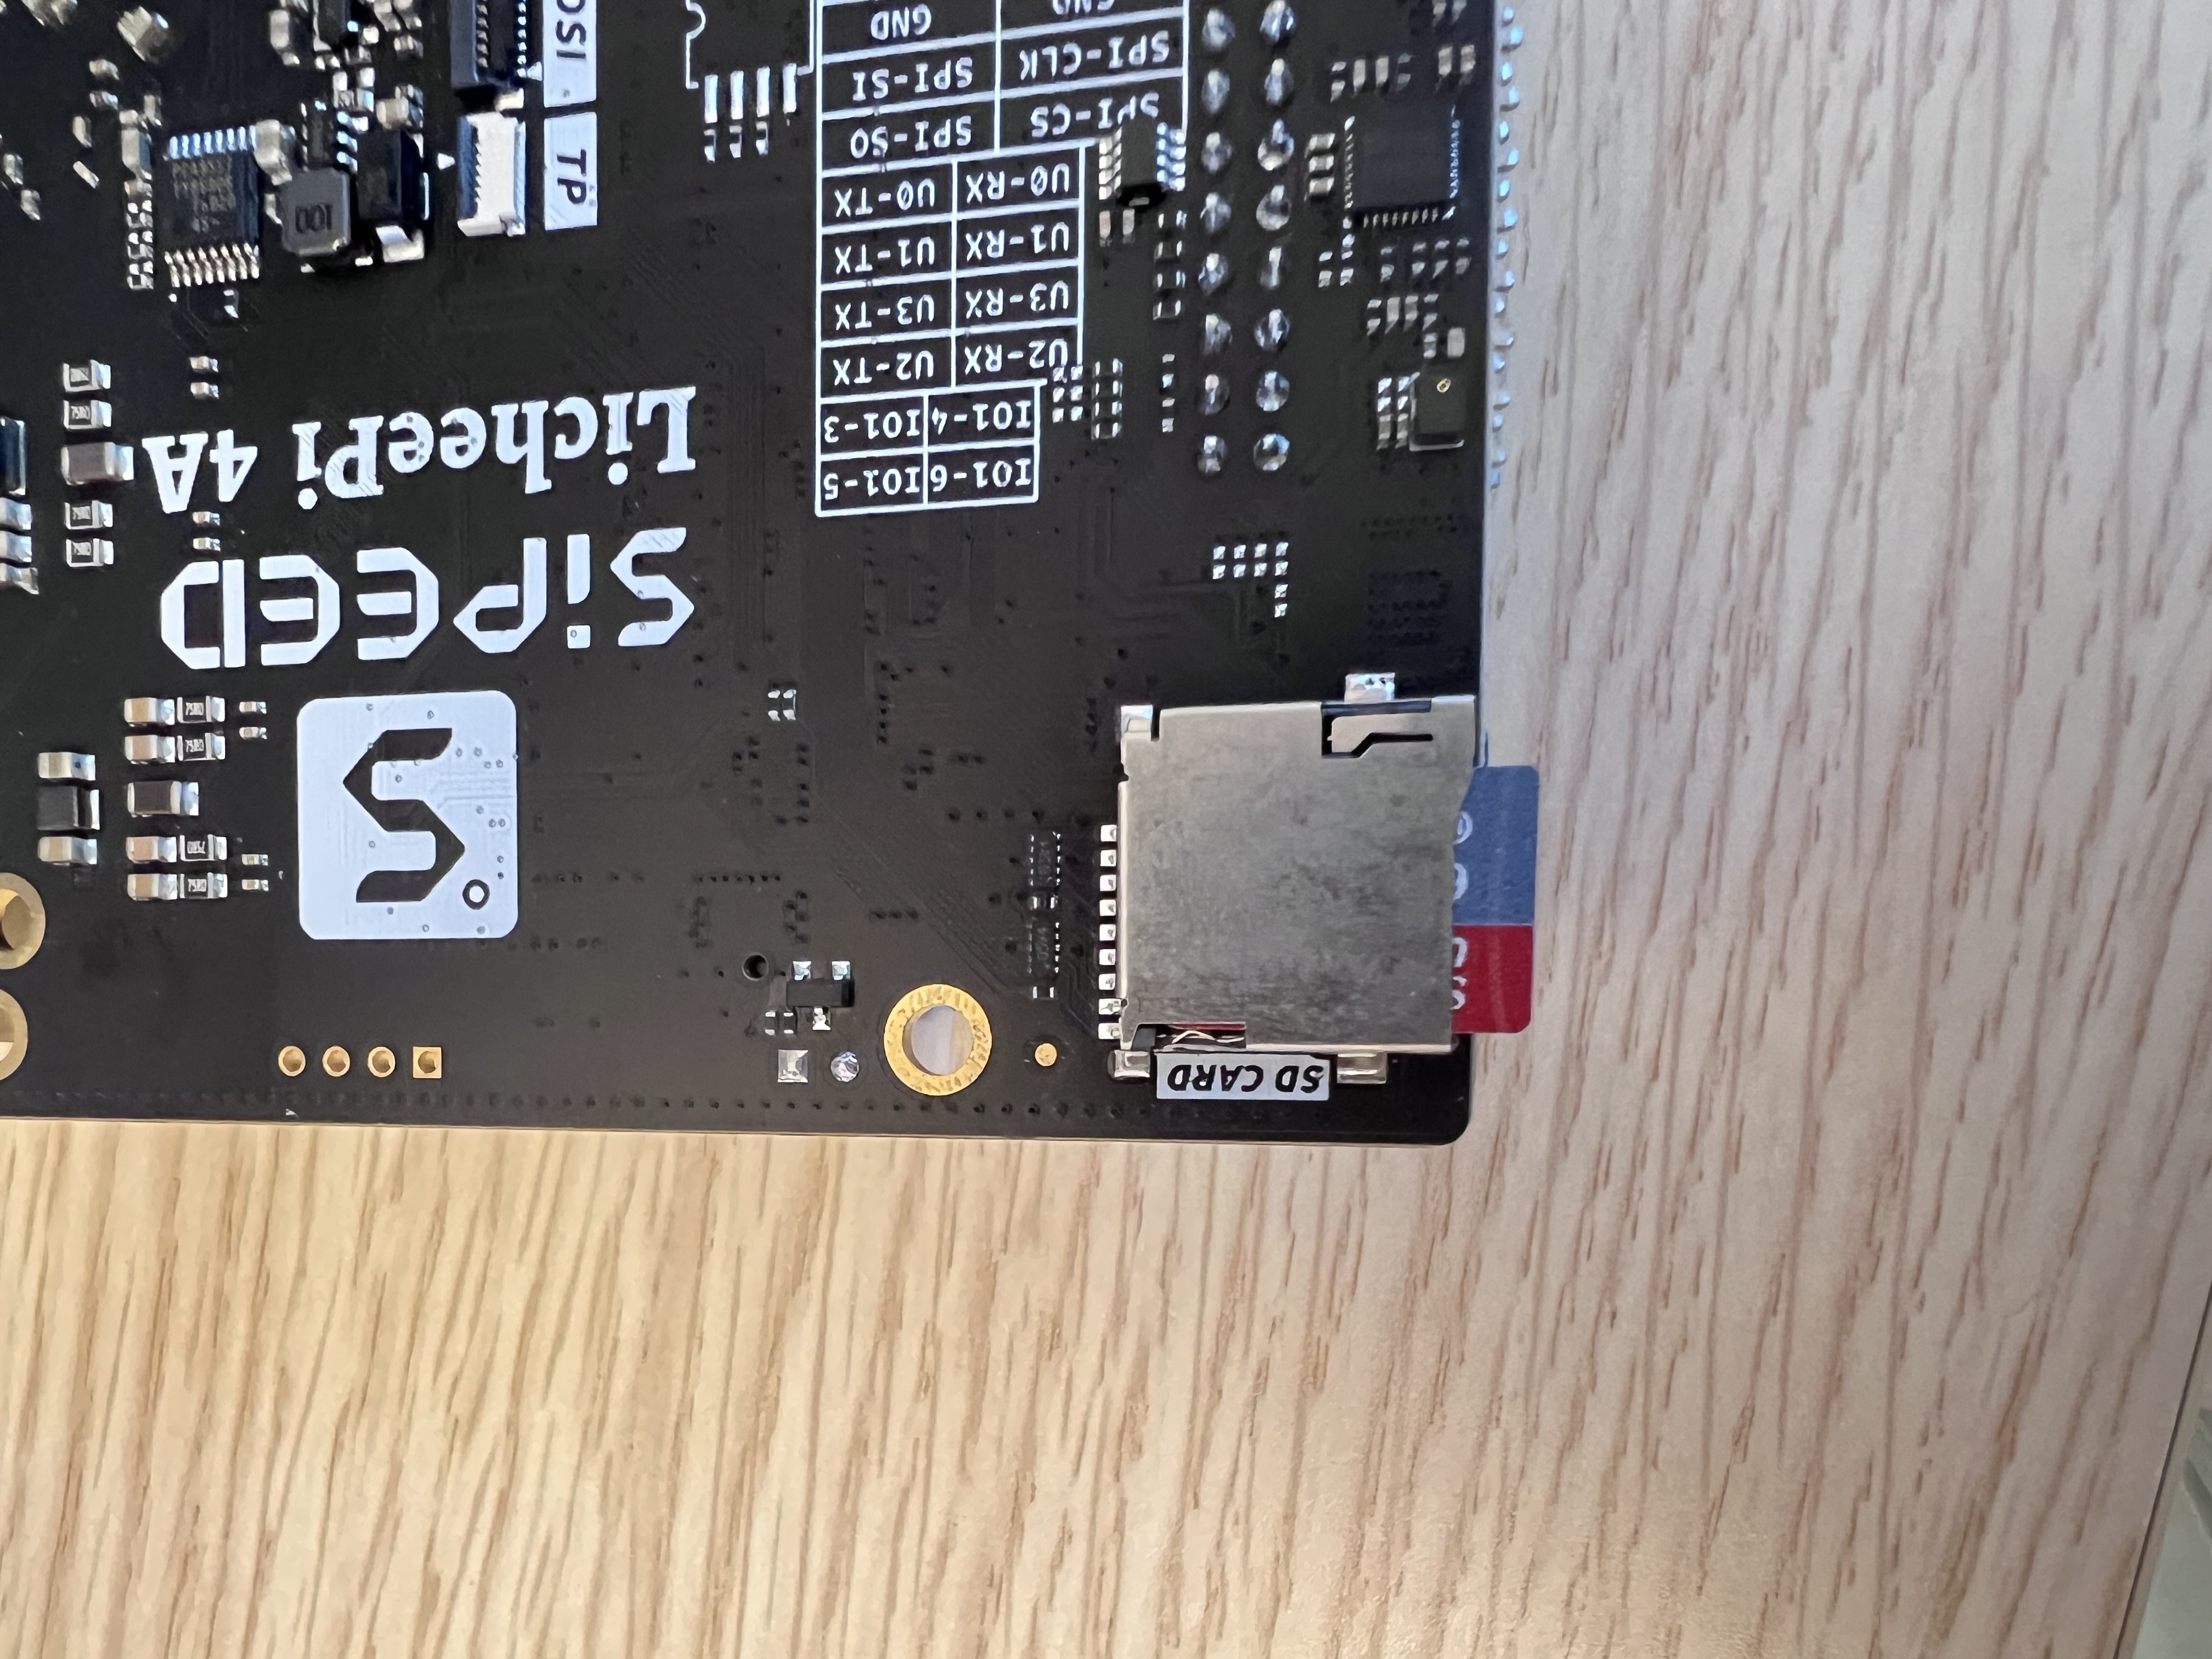
Before following the instructions, compare your board with the reference image below. Proceed only after confirming that the hardware matches.
Demonstration Environment
All steps in this tutorial were validated in the following environment:
- Operating system: Windows 11 24H2 (OS build 26100.3194)
- Architecture: x86_64
- Lichee Pi 4A configuration: 16 GB RAM + 128 GB eMMC
Every procedure documented here is reproducible in this environment. If you encounter any issues during flashing, please refer to issue submission.
Boot Options
Lichee Pi 4A supports two boot modes: boot from an SD card and boot from eMMC. Select the mode that fits your scenario.
Flashing an image erases all existing data. Back up important information before you start.
Boot from SD Card
DIP switch reminder
Booting from SD card does not require changing the DIP switch; keep it in the eMMC position.
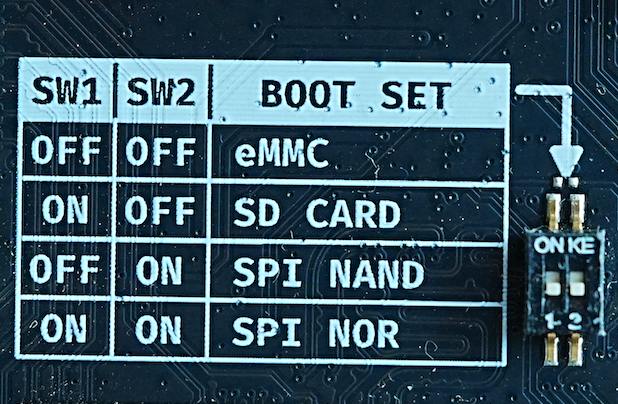
The DIP switch is located on the underside of the board and becomes visible after removing the core board. Both toggles should point downward.
Note: Early revisions of the Lichee Pi 4A board may not include a DIP switch.
SD card compatibility
Some SD cards may not work reliably. Check the Lichee Pi 4A SD card compatibility list to confirm whether your card has known issues.
Preparation
Upgrading from images dated 20240720 or earlier requires resetting the U-Boot environment variables.
Reset procedure: Connect to the board over the serial console, power it on, interrupt U-Boot by pressing Enter, and run:
env default -a -f; env save; reset
This restores all U-Boot environment variables and reboots the board.
Obtain the SD Card Image
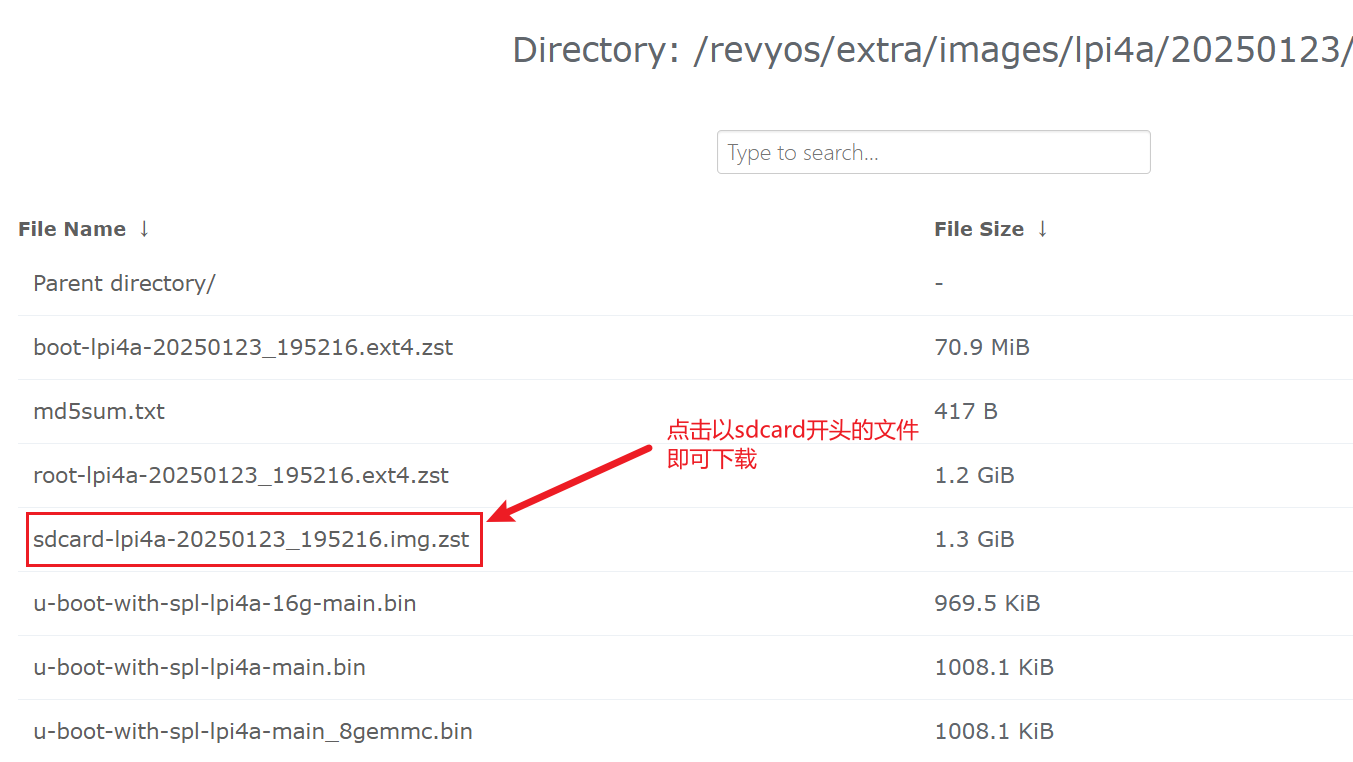
Download the Lichee Pi 4A system image that starts with sdcard- from the following locations:
- RevyOS 20240720 (Kernel 5.10)
- Latest release (Kernel 6.6): 20251226
About kernel versions
The 20240720 image uses Kernel 5.10, which is stable for multimedia and general workloads.
The latest image uses Kernel 6.6. It may still contain unresolved issues—video stutter and USB power loss have been observed and are being fixed.
The example below uses the 20250123 image.
Two download methods are available:
- Browser download: click the link to start downloading.
- Command-line download: open PowerShell and run:
curl.exe -OL https://mirror.iscas.ac.cn/revyos/extra/images/lpi4a/20250123/sdcard-lpi4a-20250123_195216.img.zst
curl.exe has shipped with Windows since Windows 10. If it is unavailable, use the browser download method instead.
Wait until the progress reaches 100%; the download then completes.

Regardless of the method, the result is the compressed archive sdcard-lpi4a-20250123_195216.img.zst. Because transmission errors can occur, verifying the download with a checksum is recommended.
Verify the Image (Optional but Recommended)
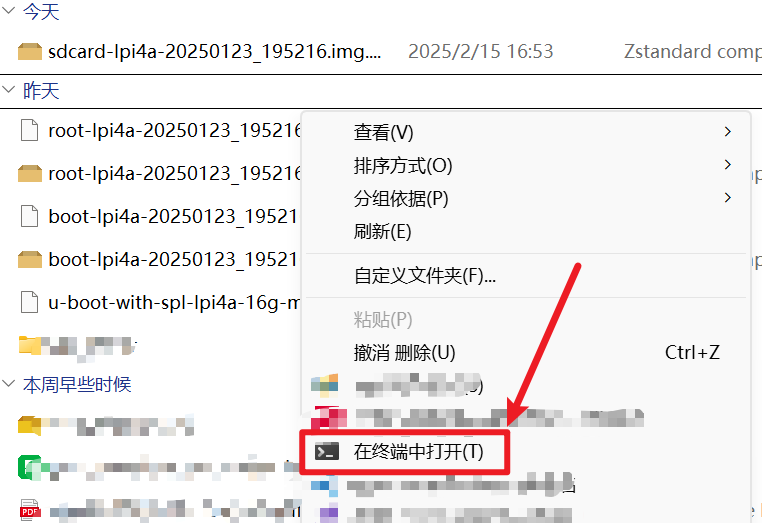
Open File Explorer, navigate to the folder containing the image, right-click, and choose Open in Terminal.
In the PowerShell window, fetch the reference checksums from the mirror:
curl.exe -L https://mirror.iscas.ac.cn/revyos/extra/images/lpi4a/20250123/md5sum.txt
Then compute the checksum for the local file:
Get-FileHash -Algorithm MD5 .\sdcard-lpi4a-20250123_195216.img.zst
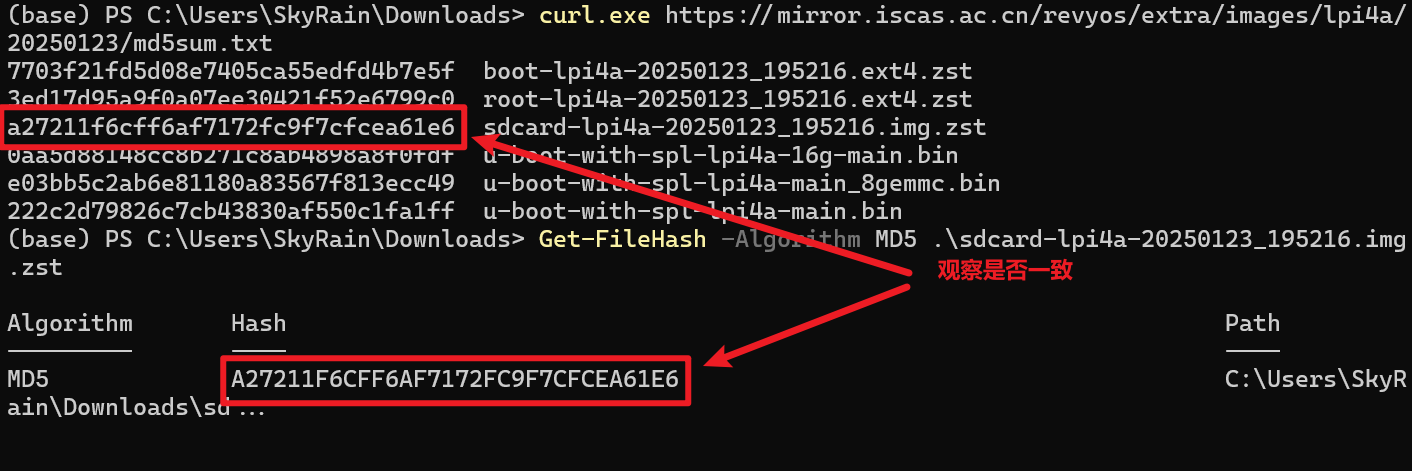
Compare the two values. If they differ, re-download the image.
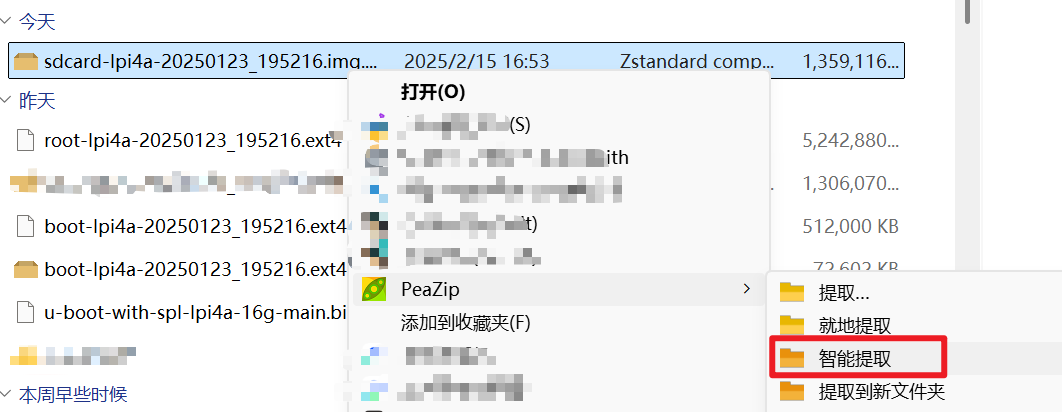
Extract the Image
The image is compressed with zstd. Use an archive tool that supports .zst, such as PeaZip or 7-Zip (Zstd build).
Extraction size reminder
The extracted file is about 10.2 GB. Ensure sufficient disk space before unpacking.
Hardware Preparation
Prepare a MicroSD card reader and a MicroSD card. Because of compatibility concerns, consult the tested card list.
If your card is not on the list and you experience flashing or boot failures, submit an issue via this page and consider using the eMMC flashing method instead.
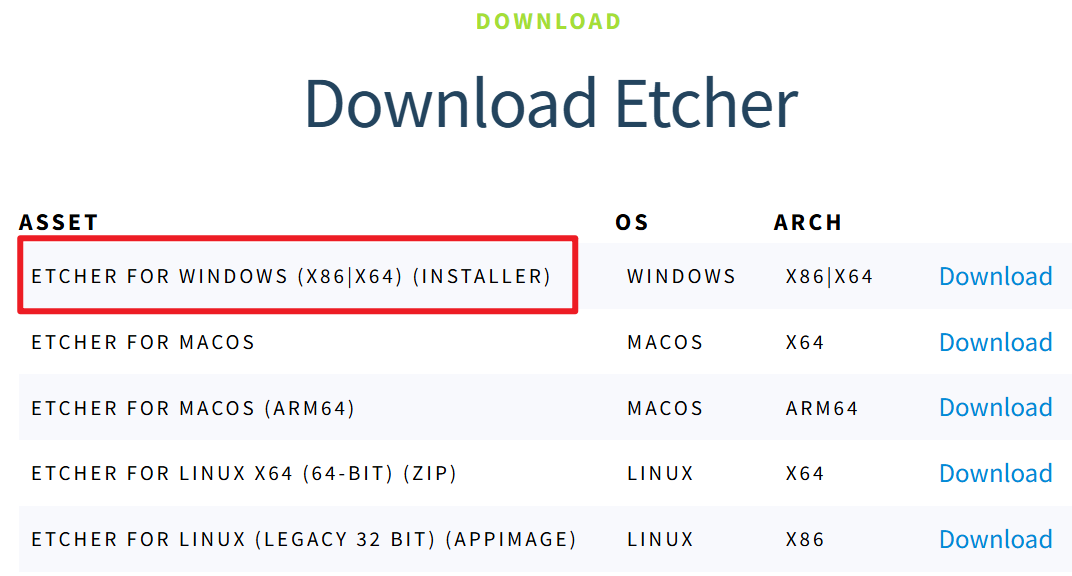
Write the Image with BalenaEtcher
Download BalenaEtcher from https://etcher.balena.io/. Select Etcher for Windows and install it.
- Insert the SD card into the reader and connect it to the PC.
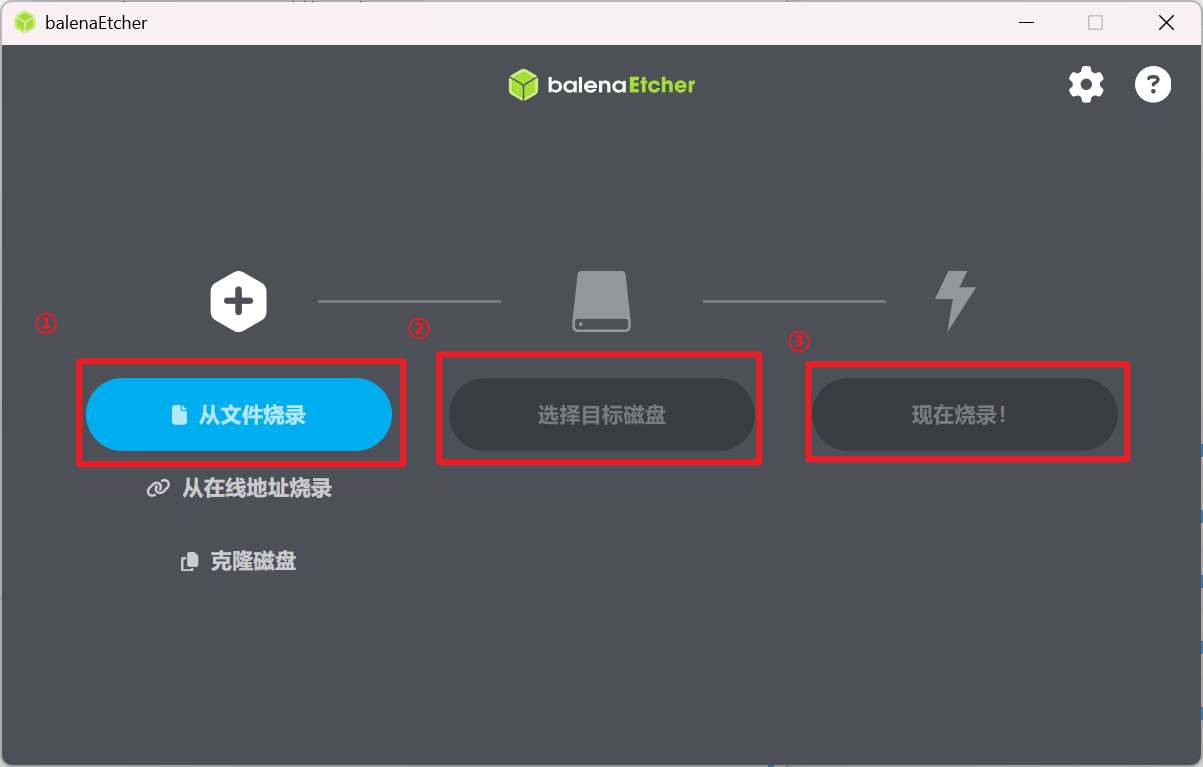
- Launch BalenaEtcher.
- Click Flash from file and choose the image.
- Select the target device.
- Click Flash to start writing.
- Wait for the success message.
Safe removal reminder
Before removing the SD card, ensure BalenaEtcher reports completion, the SD card LED has stopped blinking, and eject the card via the system tray. Otherwise, the card or data may be corrupted.
Boot the System via SD Card
After flashing, insert the SD card into the slot shown below.
Connect an HDMI cable if a monitor is required. Use the supplied USB-A-to-USB-C cable: plug the USB-C end into the board and the USB-A end into a power source that can supply at least 5 V / 2 A to power on the system.
Boot from eMMC
You can flash the eMMC image with or without a serial cable. Because a serial cable is optional, the default workflow below assumes no serial connection. If you plan to use a serial console, refer to the relevant sections in the Linux flashing guide.
Remove the SD card before booting from eMMC.
Preparation
Upgrading from images dated 20240720 or earlier requires resetting the U-Boot environment variables.
Reset procedure: Connect to the board via serial, power it on, interrupt U-Boot, and run:
env default -a -f; env save; reset
This restores all U-Boot environment variables and reboots the board.
Install the Flashing Tools
Flashing eMMC requires writing the u-boot, boot, and root images with fastboot. Determine whether fastboot.exe is installed. If it is missing or older than version 34, install the latest Platform Tools:
winget install google.platformtools
(Older fastboot releases fail when flashing recent images.)
Open PowerShell in the folder containing fastboot.exe and verify it runs:
.\fastboot.exe --version

A version string indicates that fastboot is ready.
Obtain the Images
Download the Lichee Pi 4A system images from:
- RevyOS 20240720 (Kernel 5.10)
- Latest release (Kernel 6.6): 20251226
About kernel versions
The 20240720 image (Kernel 5.10) is stable for multimedia workloads.
The latest image (Kernel 6.6) may still expose issues such as video stutter or USB power loss; fixes are underway.
Selecting the correct U-Boot image
Different memory configurations require different U-Boot binaries. Match your core board to the table below:
| Memory and storage | U-Boot image |
|---|---|
| 8 GB RAM + 8 GB eMMC | u-boot-with-spl-lpi4a-main_8gemmc.bin |
| 8 GB RAM + 32 GB eMMC | u-boot-with-spl-lpi4a-main.bin |
| 16 GB RAM | u-boot-with-spl-lpi4a-16g-main.bin |
If you cannot confirm the configuration, scan the QR code sticker on the core board. Each shipped board includes stickers on both the core and base boards. Scanning the core board sticker reveals the RAM and storage combination.
Example for a 16 GB RAM + 128 GB eMMC board:
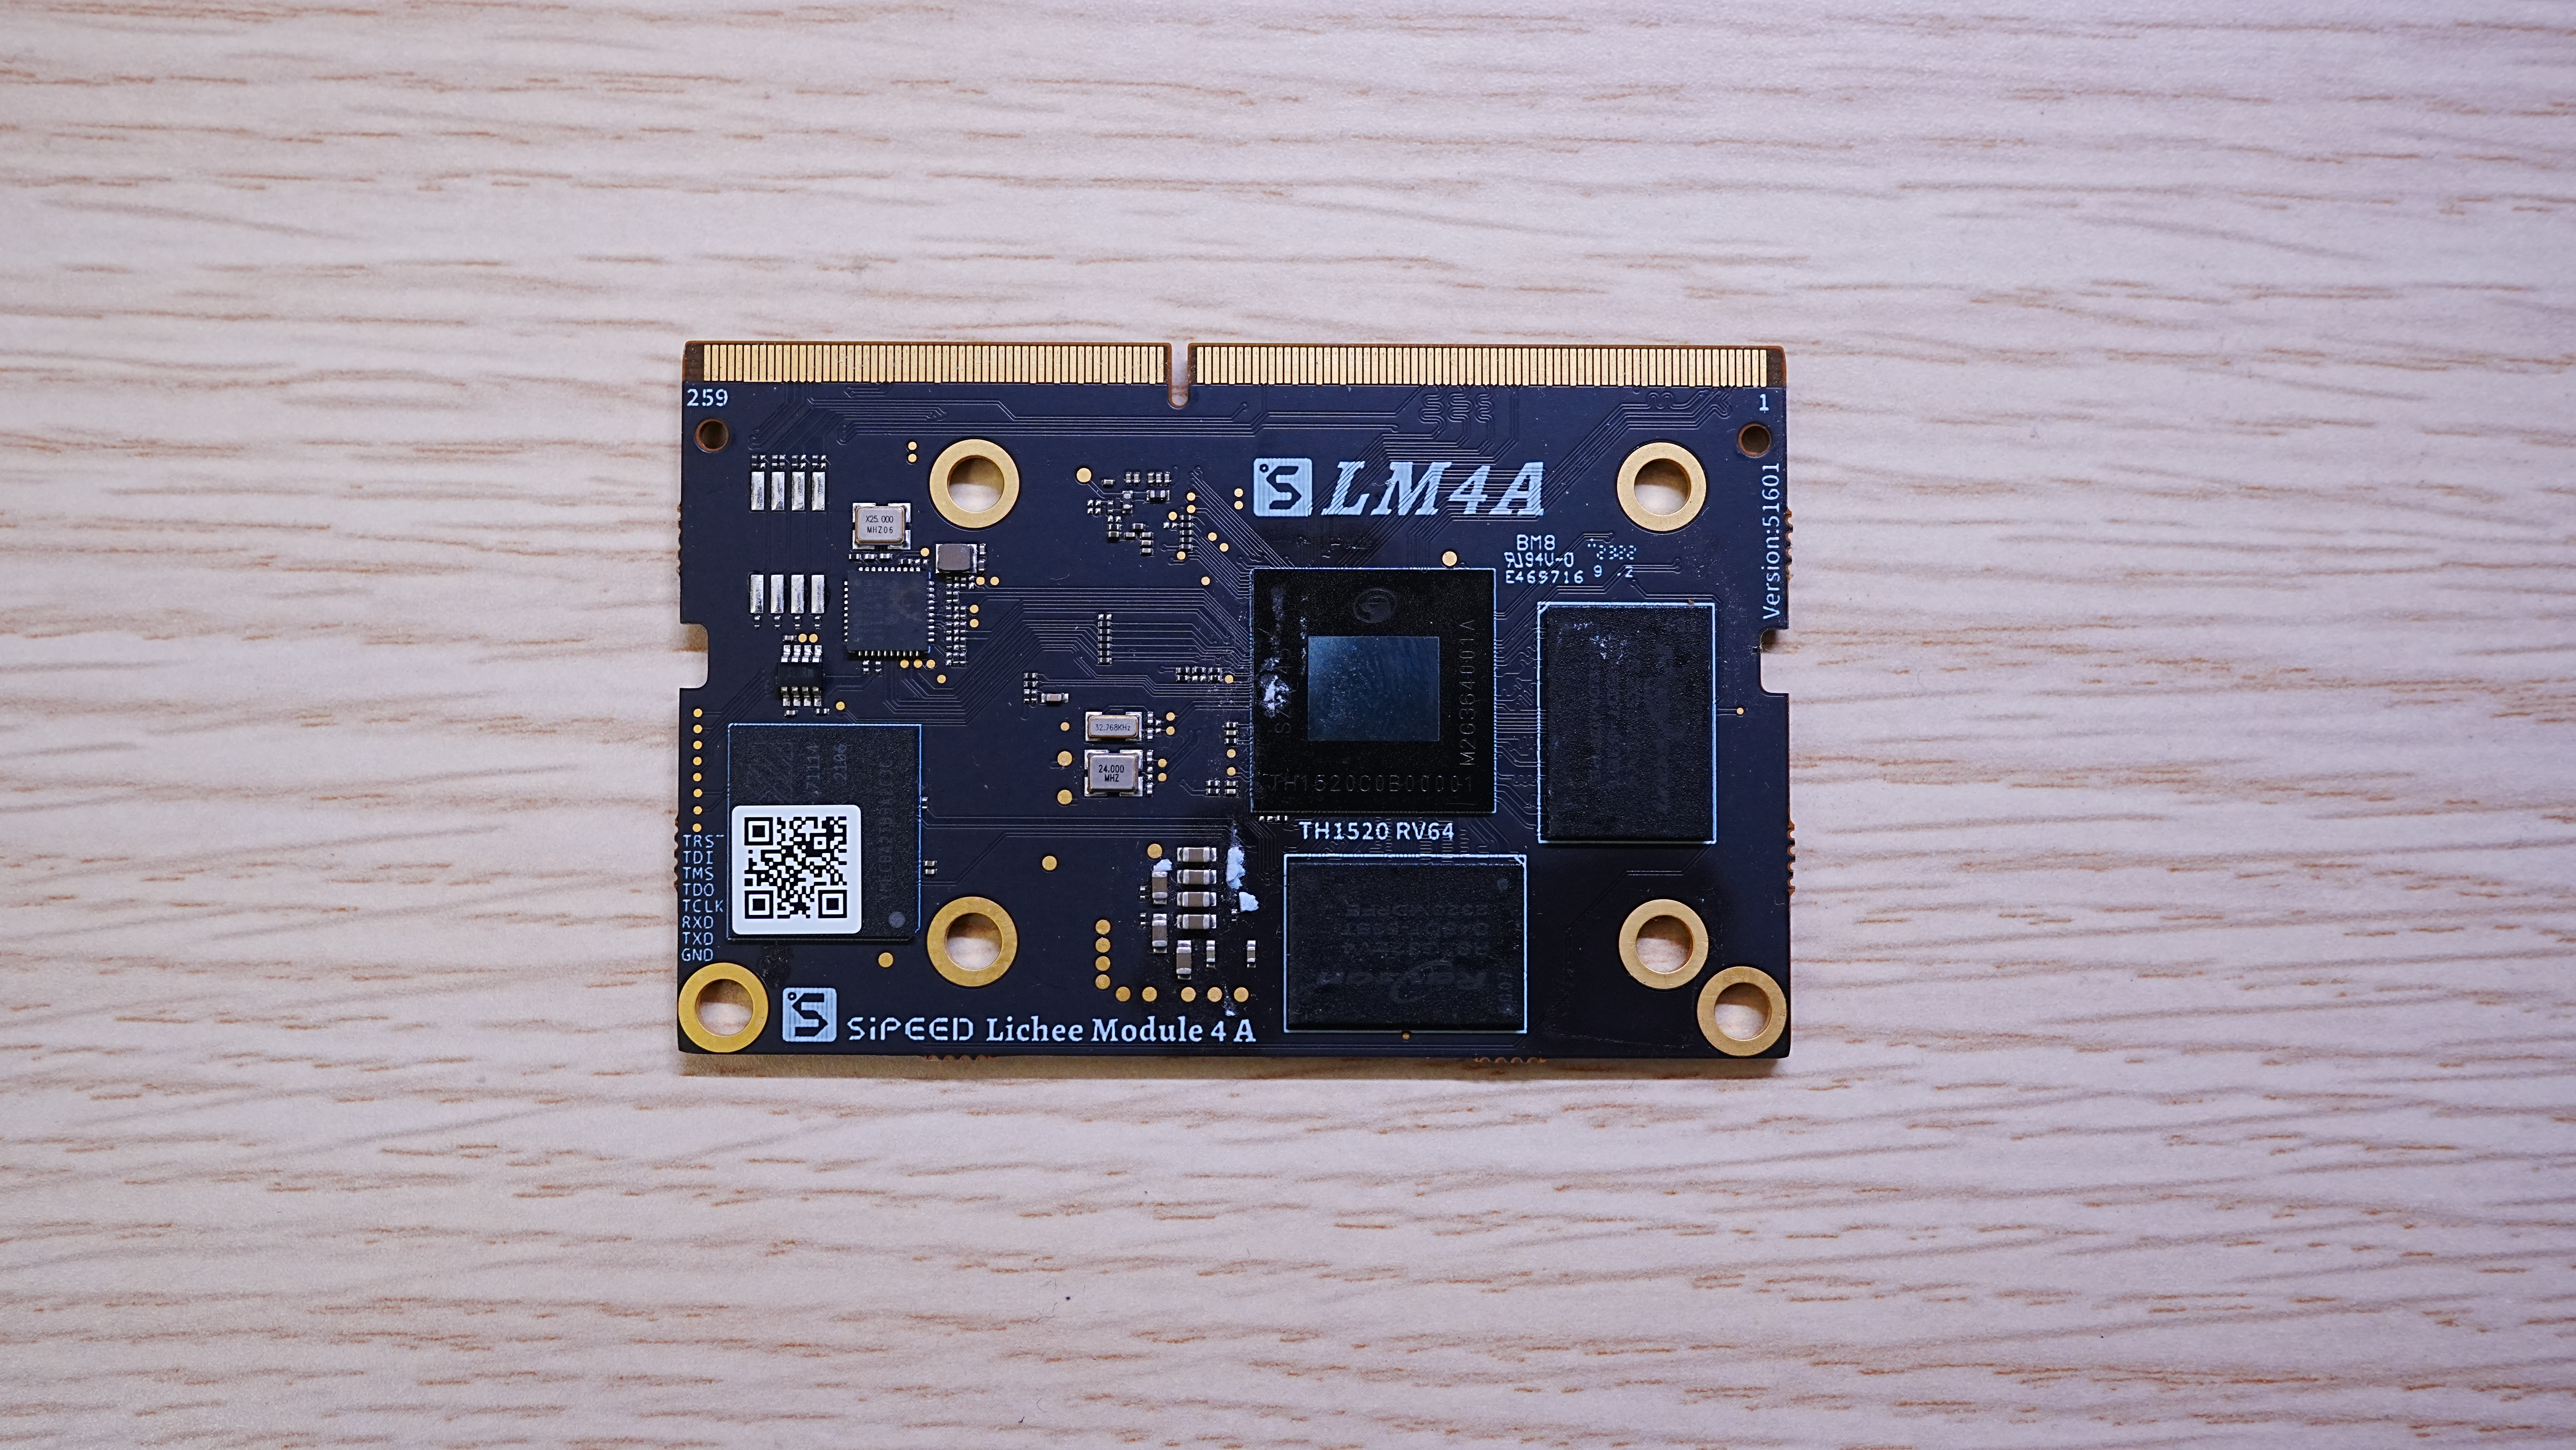
The scanned result looks like this:
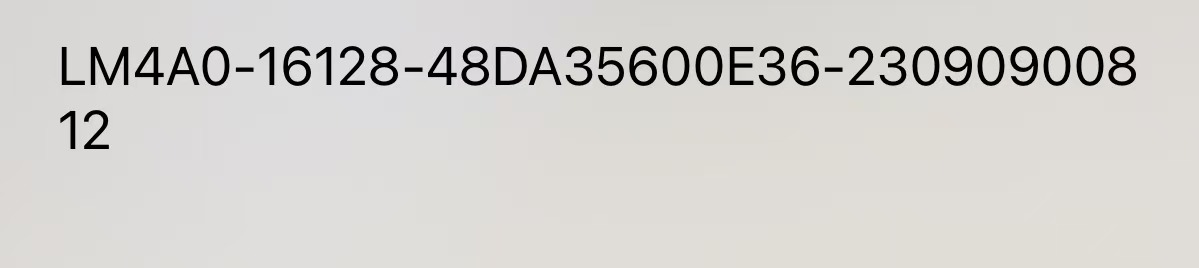
The second line specifies the RAM plus storage configuration.
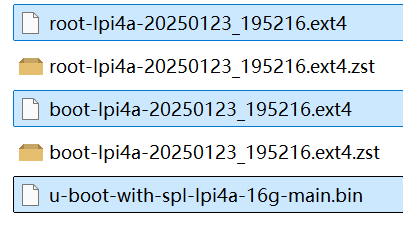
After identifying the correct build, download, verify, and extract the uboot, boot, and root images (the U-Boot binary does not require extraction) as described in the SD card section.
Connect the Board and Install Drivers
Press and hold the BOOT button, then connect the Type-C port nearest the BOOT button to the PC. The board enters flashing mode.
Open Device Manager. If you see USB download gadget under Other devices, the device is detected but lacks a driver.
Download the Google USB Driver (a proxy may be required), extract it, and install it:
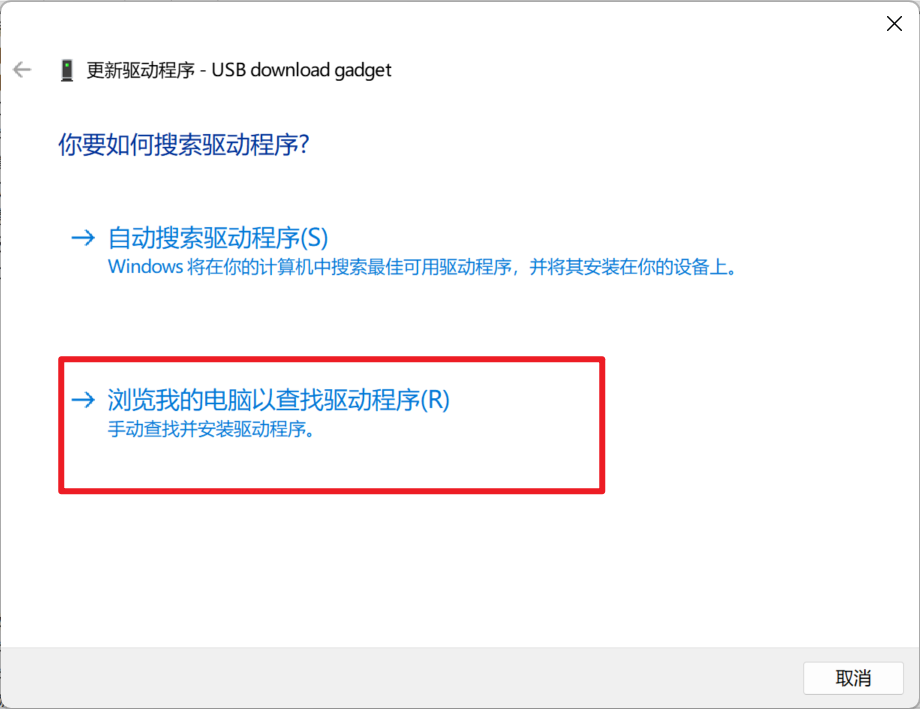
- Right-click
USB download gadgetand choose Update driver. - Select Browse my computer for drivers.
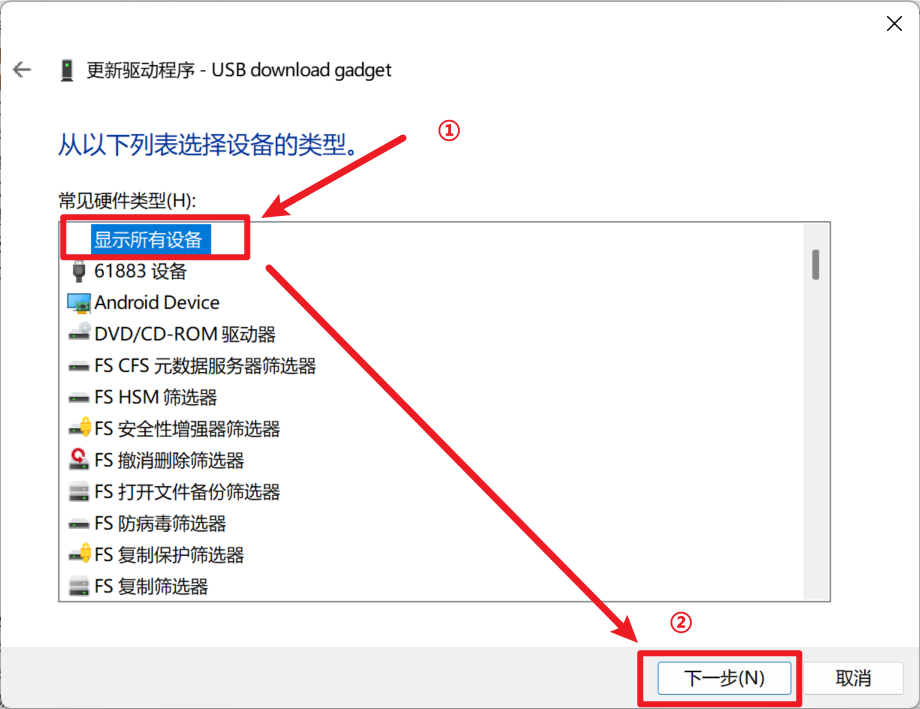
- Choose Let me pick from a list of available drivers on my computer.
- Select Show All Devices, then click Next.
- Click Have Disk.
- Click Browse, select the
.inffile inside the Google USB Driver folder, and confirm.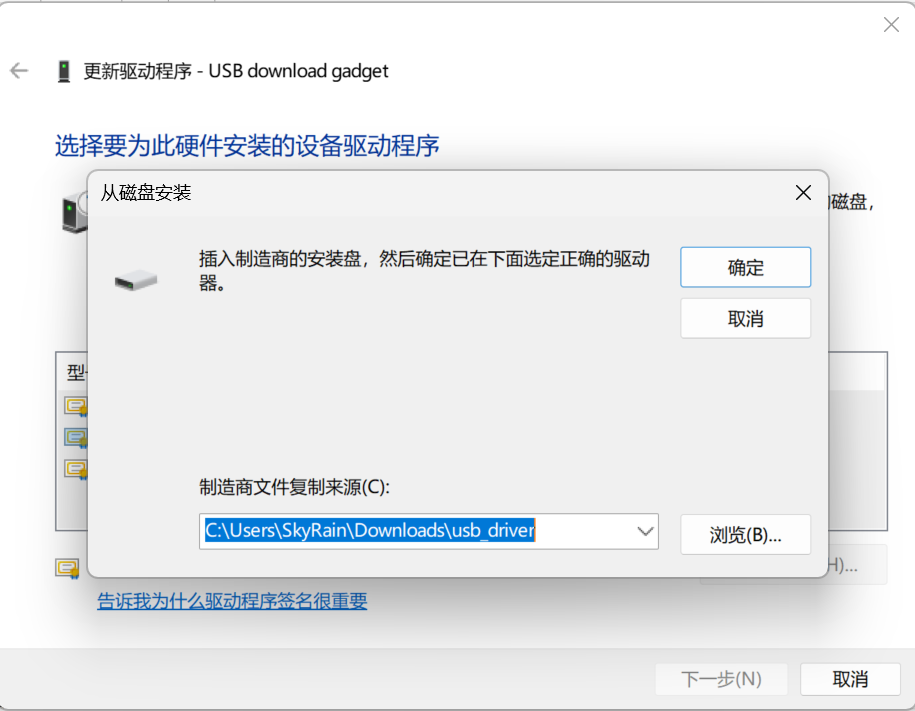
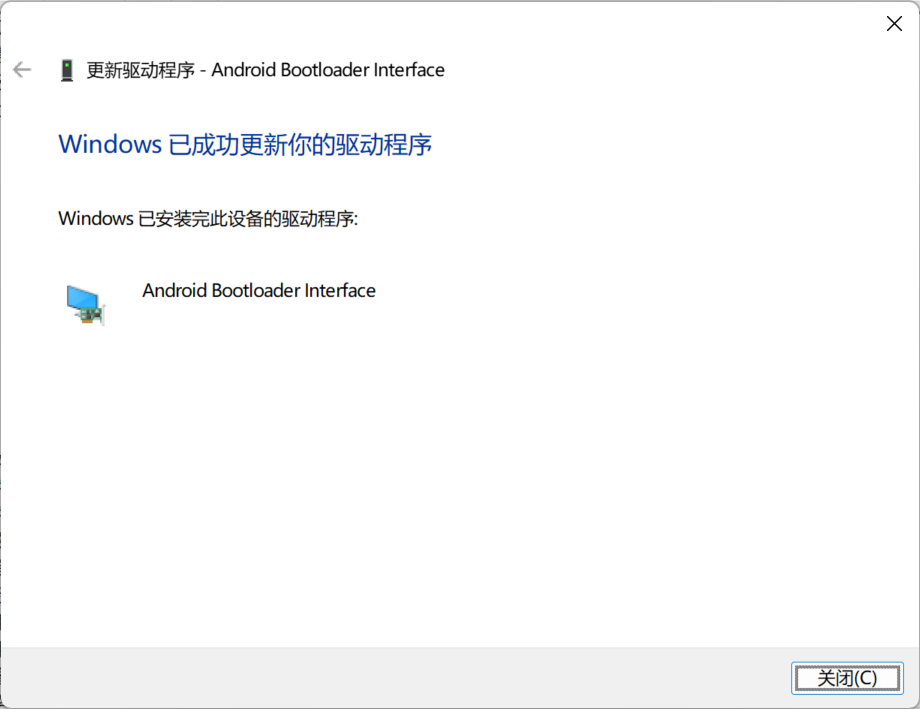
- Choose Android Bootloader Interface, click Next, approve the prompts, and select Install when Windows Security asks for confirmation.
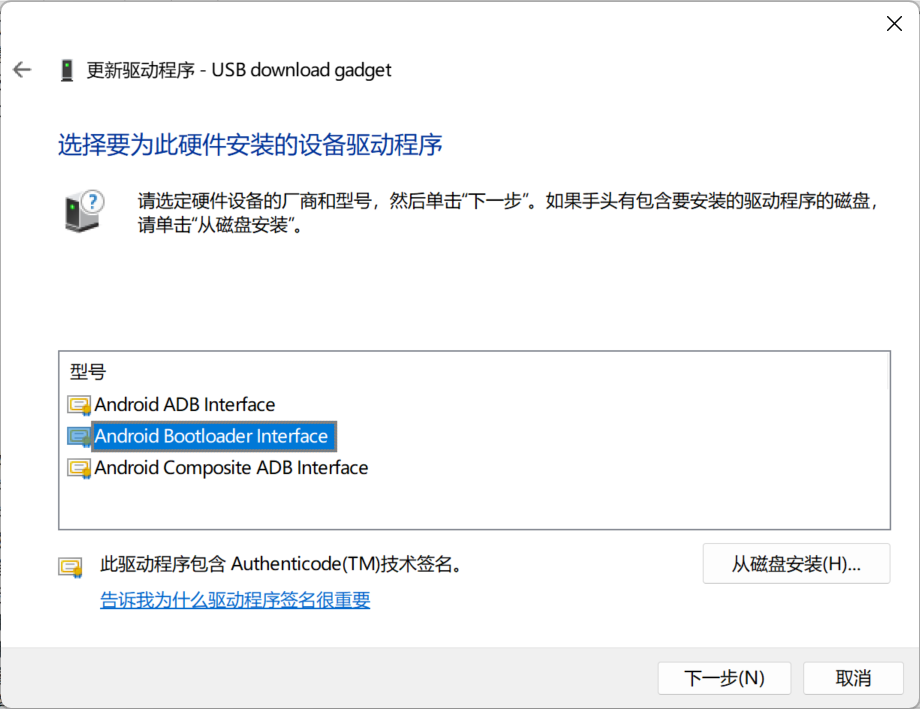
- The fastboot driver finishes installing.
If installation fails, uninstall the device from Device Manager, reconnect the board, and repeat the steps.
Flash the Images
Back in the PowerShell window that contains fastboot.exe, verify the device connection:
.\fastboot.exe devices

Flash a temporary U-Boot to RAM and reboot:
.\fastboot.exe flash ram .\u-boot-with-spl-lpi4a-16g.bin # Replace with the path to the U-Boot image for your configuration
.\fastboot.exe reboot

After the board restarts, Windows may again report an unknown USB download gadget. Install the driver once more if needed.
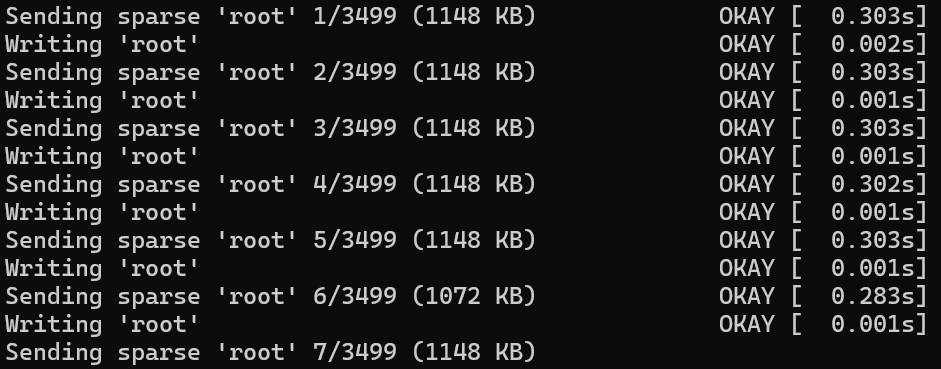
Then flash the persistent images (drag-and-drop files into PowerShell to insert their paths quickly):
.\fastboot.exe flash uboot u-boot-with-spl-lpi4a-16g.bin
.\fastboot.exe flash boot boot-lpi4a-20240720_171951.ext4
.\fastboot.exe flash root root-lpi4a-20240720_171951.ext4

Progress and timing note
Flashing uboot and boot completes quickly. Writing root takes roughly five minutes. If fastboot shows an unusually small number of data blocks (e.g. only a few thousand), the earlier steps likely failed—repeat the flashing procedure.
Once flashing finishes, power-cycle the board to boot from eMMC.
User Credentials
Default login credentials:
- Username:
debian - Password:
debian
Use these for the first boot and change the password immediately for security.